Showing posts with label Polychromos pencils. Show all posts

Wednesday, 31 January 2018

Happy Valentine's Day!

Hello everyone,
Hallo allemaal, 

I have made another two projects for Hobbycompleet De Duif with Gerda Steiners fab 'Valentine Penguins'. It is a tag and a card:

Ik heb voor Hobbycompleet De Duif nog twee projecten gemaakt met de 'Valentine Penguins' van Gerda Steiner. Het is een label en een kaart:


Materials for the tag/Gebruikte materialen voor de label:
- Amsterdam Acrylics of andere acrylverf
- Washitape naar keuze

Materials card/Gebruikte materialen voor de kaart:
- restje design papier/scrap designer paper


Leuk dat je er was vandaag ! 
Thank you for stopping by today ! 

Tuesday, 24 May 2016

How do you do ?


Hello everyone,

and happy Tuesday ! For my DT post for Visible Image today, I have made an art journal to celebrate the UK release of the new Tim Burton film "Alice through the looking glass" on the 27th of May.

There is an awesome BONKERS OFFER going on too ! If you like the stamps, you'll have to have a look HERE


As I simply love Tweedle Dee and Tweedle Dum the choice what stamp to use was easy ! 


Yes, I know.... it is very bright ! haha... 
I had so much fun making this! For the background I used a technique shown by Leandra from Paperartsy on YouTube. You brayer the paint on. It is quick and easy and the result is different every time. I really liked this although I have used a lot more colours than I usually would. 
Anyway, when this had dried I used the 'Retro Dots' (now retired sadly) to stamp the background; using inks in similar colours. I used Archival and Distress for this. Next I took the script stamp from the 'Revolution' set and stamped that with black Archival Ink. 
I also drew a line around the page. I think this is becoming one of my trade marks... 
TweedleDee and TweedleDum were stamped on drawing paper and coloured with Faber Castell Polychromos and Carand'Ache Pablo coloured pencils. Normally I blend the colours 'dry' but today I used a blending stump and some Odourless Miniral Spirit to blend the colours together. 
I adhered the duo to the page and coloured some shade under their feet with the same pencils. Lastly I stamped their names on their chests and adhered the sentiment which was stamped on a separate piece of paper and cut out. I also doodled around the words. 

I have used the following stamps:


Social Media, Blog and monthly Challenge details :


Show & Tell Monthly Challenge details: http://visibleimage.co.uk/challenge 


Monday, 1 February 2016

Imagination

Hello everyone,

I did a mini art journal with Lost Coast Design stamps. Lately I have been using Design paper for my backgrounds and that is also what I have done here. It was a greyish paper and I used yellow and orange paints to  colour it. What I like is that you can still see the paper through the paint.


The paint I used was Fresco Finish Acrylic paint by PaperArtsy and it was brayered on the paper. I stamped the background using different colours of ink and a selection of stamps. There is a list of the stamps I used at the bottom of this post. 
The woman was stamped on the page and on white card stock. I coloured the one on the card stock, cut her out and adhered her on top of the one on the paper after glueing down some washi tape to ground her. I glued some more of this washi tape at the top and left of the left page. 
Lastly I typed a sentiment, cut it into strips and adhered the strips to the page and doodling around each word. That were the pages done. All I had to do then was glueing them in my mini journal. 

I used the following stamps: 
Bugz set (just for the little bits of black text)

You can get these stamps at Lost Coast Designs if you live outside Europe. If you live in Europe you can get them from Inkadinkadutchies. If they do not have them in stock, they will be able to order them for you. 

Thank you so much for stopping by today !  

Friday, 1 January 2016

Happy new year !

Hello everyone,

and happy New Year ! I hope you all had a lovely Christmas time. Can't believe the year has gone already...

For my DT post for Roc Nicholas rubber stamps,  I have made a journal page :


First I took a piece of MM paper and used a Tim Holtz die to create the top; it looks like it was torn from a book. 
I then used a brayer and 3 different colours (PaperArtsy Fresco Finish Honey Dew, Sage and Limelight)  of acrylic paint to colour my background. I also found a piece of card that was already coloured with the same colours so I used that to stamp the flowers on. I cut them out, coloured the centres white and set them aside. Next I stamped the background with 'Heart Vine' and coloured the 'vines' with a coloured pencil on a sage colour. I adhered the flowers on top of the hearts. Next I stamped the head of Scooter girl and the body of Blessed Skellie, coloured them with a mixture of coloured pencils and Copic Markers and cut them out. I adhered my 'new girl' to the page. 
Lastly  I used the 'Unleash Yourself' stamp to create my "happy new year" message. I did have to draw my own 'w' ! I coloured the letters I needed, cut them out and adhered them to the page. 

I used the following stamps:


You'll find Roc's fab blog HERE...

Her stamps HERE...


Thanks you so much for stopping by today ! 


Thursday, 31 December 2015

Staying young

Hello everyone,

and welcome to my last blogpost for 2015... I have been busy in my craft room again and produced another art journal using Stampotique Stamps. I actually only wanted to practise my colouring with pencils but once she was finished I decided to put her on a journal page.


She's the lovely Mary by Stampotique Originals and she was coloured with Polychromos  and Pablo coloured pencils. As I said before, this is much more difficult than it looks and it also takes a lot of time. When she was done, I cut her out and set her aside to do the background. 

The background is a piece of pattern paper by Tim Holtz and I just brayered some paint over it using turquioses and grey. With a stencil and Versamark ink I created the swirls using an embossing powder by Lindy's Stampgang. I also stamped the background here and there. 
I adhered her to the page and 'grounded' her by putting some colour under her shoes. 

The quote is by Lucille Ball and I used my old typewriter to create it. 

Her are 2 more photos:


Thank you so much for stopping by today ! 


Monday, 14 December 2015

ATC trio

Hello everyone,

It is my turn on the Inkadinkadutchies DT today and I have made a little set of three ATC's.


Aren't they cute ?  haha... 
First, stamp the images on the cards. Make masks and cover up. Then rub dry Brusho Powders into the paper with your fingers. Wet your favourite background stamp and stamp the cards. Mist a little more water over the paper to make the colours even more vivid. Not too much or it will change into one coloured mess. 
I used coloured pencils to colour the figures after the cards dried and the masks were off. I also lightly stamped the background and doodled a one around the edges.  

That was it ! 

I used the following stamps:


You can buy these stamps at www.lost-coast-designs.com or if you live in Europe at www.Inkadinkadutchies.nl

Thank you so much for stopping by today ! 


Wednesday, 9 December 2015

Alphabets

Hello everyone,

and happy Wednesday. This is the last challenge for this year for Stampotique. Where did the time go? Seems like only last week that it was Christmas. Anyway, this week's hostess is Claudine and the theme is "Alphabets".  Here's what she said :


"Use your alphabet stamps or images to create a letter of the alphabet" 


So I created the "C" for Corrie or (wonky) Chandelier lol....


I started with a piece of Mixed Media paper on which I drew the "C". I used one of those cardboard letter that are used to make words in interior design and drew around it. I then cut it out so I had a 'stencil'. I put this 'stencil' on my paper and stamped the flowers through the hole. I also stamped the flower twice on masking paper so I could stamp them behind each other. When the "C" was full I took the mask off and coloured everything in. I used Copic Markers and Pencils. 
Next I coloured the background with my Pan Pastels. I hadn't used them in ages so that made a nice change. I then used two different stencils and a background stamp to make it all a bit more interesting. I did use the "C" that I cut out to mask off the coloured "C" on my page as not to get any ink on it. 
I then decided to stamp the chandelier, thinking I would use my home made stamp positioner but still didn't use it so it got on there wonky ! Never mind.... I coloured it with pencils and I used a white paint pen for the candles. I then I stamped Mela, coloured her, cut her out and adhered her to the page. Lastly I drew two black lines around the page. 

I used the following stamps:

Carol's flower small
Journey collage
Mela 
Gothic Chandelier

Why not play along with us this week. You could just win yourself $30 worth of Stampotique stamps. Just remember, only one entry per person per challenge an no Digi's. Have fun ! 

Sunday, 6 December 2015

A bit of Sunday Colouring fun !

Hello everyone,

I spend today practising my colouring with coloured pencils. It is not as easy as it looks ! But I like it and I am determined to get better !
For today I used ATC sized pieces of paper,  one cut from pattern paper on which I brayered some paints and doodled a bit and one pre-painted with Lindy's Stampgang Sprays.


This is Morty, he is by Vera Lane Studio. Isn't he adorable... He was coloured, cut out and adhered to the ATC made from pattern paper. 
You can get these lovely Digital images HERE 


This one is a stamp by Katzelkraft; one of the newer sheets with birds. He was stamped, coloured, cut out and adhered to the ATC which was pre coloured with Lindy's Sprays. 

These fantastic birds stamps can be seen HERE.


Thank you for stopping by today.

Wednesday, 25 November 2015

Jingle Bells

Hello everyone,

Today the lovely and talented Nellie is hosting the Challenge and as a theme she chose: 'Quick & easy Christmas Card. Well I have to tell you I don't really do quick and easy.... but I gave it my best shot and here it is:


Here is a close up of the snow flake...


I started with stamping the snowflake and colouring it with pencils in very light turquoises. I then glued on the seed beads. Next I cut a white panel and a blue glitter panel to go on a white card base. After I glued on the panels I glued on the snowflake. Lastly I stamped the sentiment which says : Jingle your own damn bells!,  but I used only the words Jingle and bells, cut them out, inked the edges with Broken China distress ink and glued them on as well.

I used two stamps for this:


Why not play along with us this week; you could win one of two $30 vouchers. Just remember, only one entry per person per challenge and no digi's. 

Thank you for stopping by today ! 


Wednesday, 11 November 2015

A brandnew challenge !

Hello everyone,

It is Wednesday and that means another challenge has been launched on the Stampotique Blog. This week our hostess is the lovely and talented Samantha ! Her theme is 'Take a box' and this is what she had to say about it :

"I get very excited when I see cardboard boxes. The potential of a box is enormous. So for this weeks challenge I'd like to see you all use a box as part or all of your creation. You can keep your box as a box or cut it up and use it flat. It's up to you just have lots of fun!"


Here's mine:


I used this little box in which there were some Christmas lights. 


An this is the end result....


From different angles


Here is a close up of one side of the box.


I started by cutting off the flaps on the top of the box and glueing book pages on it using gel medium. Next I painted the whole thing with gesso and after that dried, used a stencil and some model paste to put the letters on for more interest. The box was then coloured with Lindy's Stamp gang sprays. I used one with and one without sparkle.
Next I stamped the background with a few different stamps; a list of all the stamps I used is at the bottom of this post. 
I also went around all the corners with my black Archival Ink pad and also used this ink and my fingers to accentuate the letters a little. 
next I stamped Peggy on the front of the box... and failed miserably.. She was only stamped partially. Instead of throwing the box away I decided to stamp her again on tissue paper and adhere this over the failed image on the box. Hurray, success... 
Next I stamped Peggy again on white card stock and coloured the 'open' parts of her with coloured pencils. I then cut all these bits out and adhered them onto the image on the box. 
I typed the words 'watercolour' and 'pencils' on a strip of blank book page and adhered that to the box too. Lastly I doodled around the words and put my pencils in my finished box ! 

I used the following stamps:


Why not join us this week and alter your own box. You can win one of two $30 vouchers at the end of the month. Just remember only one entry per person and no digi stamps ! 

Thank you so much for stopping by ! 

Tuesday, 10 November 2015

Tick tock

Hello everyone,

Today I have made a card for the Art Journey challenge "Anything goes". You'll find  all the details HERE.


This card was created by white embossing the flowers and stamping the lady first. I then masked the lady and colouring the background with Distress Inks and a blending tool.
I then over stamped with the swirl and doodled the black line around the card. 
Next I coloured the lady with colour pencils and when that was done I stamped the sentiment, doodled a line around it and adhered it to the card. 

I used the following stamps  :
Aunts 
Ripple

Thank you for stopping by ! 


Sunday, 25 October 2015

Another colouring exercise..

Hello everyone,

I did some more colouring with Polychromos this afternoon. I think this is very relaxing and boy do I need relaxing as tomorrow it is back to redecorating. So apart from the stuff I planned already I won't be around very much. It is the living room next and this is quite a big project... Never mind, I will get it done. So back to the colouring. I did another Katzelkraft cat and made it into an ATC:


The background was made with a quick spray with Lindy's Stampgang Spray, an ink pad around the edges and some background stamping. Apart from the sentiment, which is from VivaLasVegaStamps! all the stamps used are from Katzelkraft. 

Thank you for stopping by ! 

Saturday, 24 October 2015

An exercise in colouring

Hello everyone,

Today I have been practising my colouring with pencils. I still think it is a lot more difficult than colouring with Copic Markers. It also takes a lot longer...


This cat is from the latest release of Katzelkraft Stamps and so is the crown. I thought it would be fun to use one of these cats to practise my colouring. The ATC is one I had lying about and all I did was stamp the background with some more Katzelkraft stamps, stamp the cat on white card stock and on the ATC. The cat was then coloured, cut out and glued on top of himself... lol The crown was then stamped, coloured, cut out and glued on his head. It looks like he is looking at it and thinking: 'What the hell....".  

Thank you for stopping by ! 

Wednesday, 30 September 2015

Happy birthday

Hello everyone,

and happy Stampotique day to you ! Another Wednesday, another Challenge and this week the talented Janet is our hostess and she wants us to make a card for a child. This is what she said :

"So often we create to amuse ourselves or other adults. Children love stamping and enjoy to see what is created especially for them. For this week’s Stampotique Designers Challenge I am challenging you to create a card that will have appeal for a child, be it a young one or teen.".

Now I don't have any children or nephews and nieces so for me this was a real toughie ! I hope a child would like it:


I tried the clean and simple look today and started with stamping Agatha on the card with Archival Jet Black ink. I then used a  pen to draw the circles around her. I used a circle die to help me. 
I coloured the image with Polychromos coloured pencil. Lastly I stamped the Happy Birthday under the circle, glued the panel on a pink mat and adhered it to the card. 


Here is a detail photo...

I used only two stamps:


Why not play along with us this week. You could win one of two $30 gift cards to spend in the Online shop. Just remember only one entry per person per challenge and no digi's.

Thank you so much for stopping by today ! 

Thursday, 10 September 2015

50 Shades of red

Hello everyone,

Today I decided to take part in the Stampingback Challenge which this month is 50 shades of red.
I thought this was a true challenge as I hardly ever used red in my crafting so I struggled a bit.
I am also entering this card into the Craft Stamper Challenge of 'take a stamp'.


I couldn't resist using this fabulous Ballerina again.. Today I coloured her with coloured pencils. The background was stamped with red ink first and then I went over it with Copic Markers. It then was too red for the ballerina to stand out so I used some gesso to tone it down.  The flowers were white embossed, coloured and cut apart and I only used part of them. 
The dancer was placed on some washi tape. The last thing I did was draw some lines around the panel before adhering it to a card. 

Thank you for stopping by today ! 

Wednesday, 9 September 2015

Approach with caution

Hello everyone,

and happy Wednesday ! Nellie is hosting the challenge over at the Stampotique Designers' Challenge blog. She wants us to use only 2 stamps and this is what she says :


"I tend to use a lot of stamps when I create something. Thought I might challenge myself and all of you by limiting the number of stamps. So no more than two stamps please!"

I normally use a lot of stamps too when I am creating so using only 2 was a bit of a challenge... I made up for it by using lots of paints, inks and stencils though ! 

Here is my art journal page :


Here's how I made it: 
I stamped Topher on a blank piece of paper and then used Dylusions Paints to colour the page. I used a brush and an old credit card today. I mixed the blue, the turquoise and the pink with white to make pastel shades. I painted around Topher. Next I did all the stencilling, using the black and white Dylusions paints and a bit of Distress Ink.
Next I used a bottle top for the circles and a creditcard for the stripes. 
After I decided I was happy with the background I coloured Topher with my Polychromos Pencils. Lastly I stamped the sentiment. I used these two stamps:


Why not come and play along with us. You might win one of two $30 vouchers for the online shop HERE. Just remember NO digi's and only one entry per person per challenge ! 
Good luck! 

Thank you for stopping by ! 

Monday, 6 July 2015

A new challenge ...

Hello everyone,

Time for another Challenge over at the Lost Coast Design Challenge Blog. The theme is "Zentangle". I love Zentangle but only if others do it... lol. I have no patience for it. For this inspiration piece I did my best but it was very difficult...


I have used only on stamp which is Carmen's Verandah  'Rabbit Square'. I stamped it on the card and then used a black fine liner pen to create the Zentangles around it. I also stamped the rabbit on white card and coloured it with my coloured pencils. I used a grey pencil to shade the Zentangles here and there too. The rabbit piece was cut out and adhered on top of the image on the card and then I matted the whole card on some green paper. 

Thanks for stopping by today ! Come along and play with us this month; you might win some rubber! 


Tuesday, 26 May 2015

Attitude

Hello everyone,

Finally I am in my craft room again doing what I love. And I managed to ink up Skiddy. I had her for a while but only today did I have time to use her. I made a postcard.


I used a background I made a while ago by painting a piece of 12'x12' card stock and randomly stencilling it. I then cut it in 6 pieces and hey presto, 6 postcards.. So I added some more stamping using "Fax to Wolfgang", doodled around the edge and stamped "Skiddy" on the card too. I then stamped her on white card stock, coloured her with pencils (I used Faber Castell Polychromos, and I am still learning). I then cut her out and adhered her on some washi tape on top of her image on the card. That way it looks like you cut it out perfectly. 
The sentiment was made with my old typewriter and then doodled around. 

Thanks for stopping by today ! There will be a new post tomorrow for the new Stampotique Designers' Challenge.... so come back and have a look ! 


Wednesday, 11 March 2015

50 Shades of GREEN Blog Hop and Giveaway !

Hello everyone, 

and welcome to the Lost Coast Designs

"50 Shades of GREEN" 
Readers Progressive Blog Hop Giveaway!
Win a $20 gift certificate to spend at Lost Coast Designs!

The Lost Coast Designs DT will kick off 
the hop on March 11 (My birthday, yay !!!) at 11am PST, which is 8.00 PM in Europe.

Hop our blogs to get inspired and then come and join the fun!
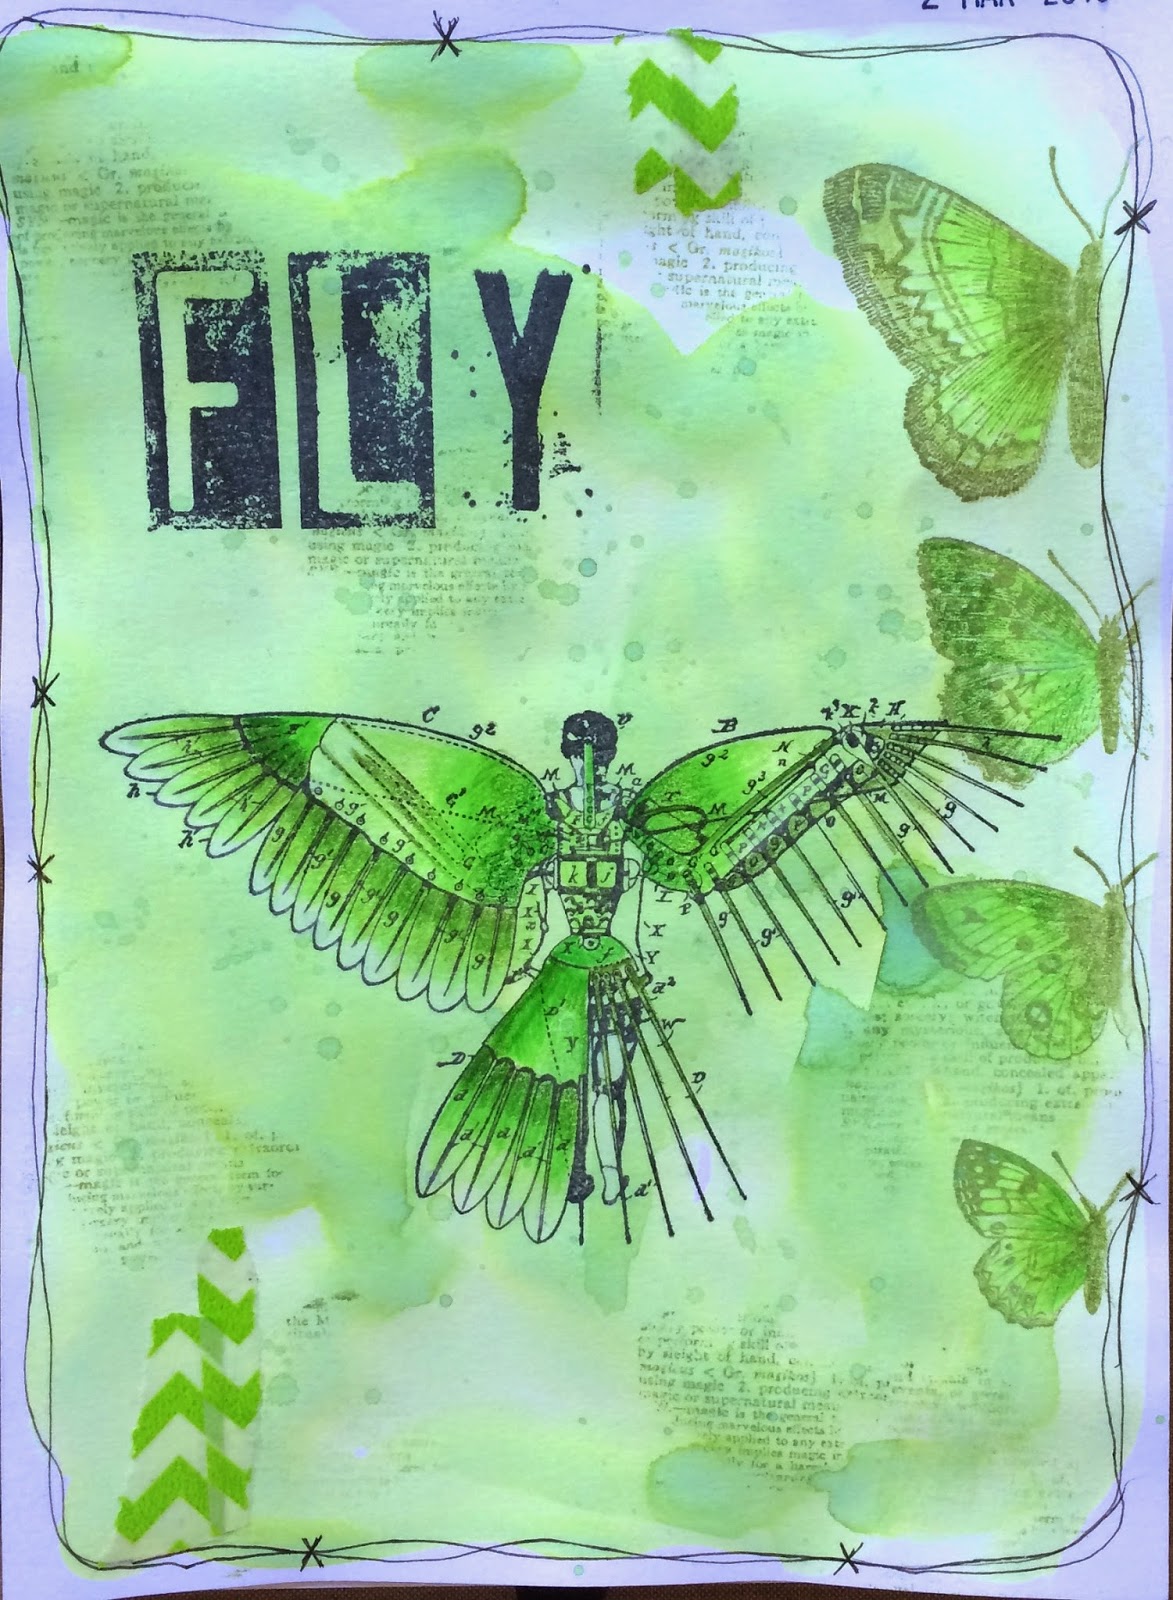
Here is my Art Journal:


It is very green. Tell you a secret; I really do not like green. In fact I do not own one piece of clothing in green. I also have not many paints and inks in green, so this was a bit of a challenge !
I was made with Lindy's Merry Go Round Green Flat Fabio Spray and Lost Coast Designs Stamps. I also used black and green ink to stamp, white paper in my journal, some green washi tape and my Polychromos Colour Pencils to colour in the Winged Girl. 

Members of the Lost Coast Design Team kick off the hop today at 11am PST so pop on 
over, hop all the blogs, get inspired and join the fun!  Link up your own Shades of GREEN projects from today through to March 30 and keep the blog hop rolling!  Visit the Lost Coaster’s Review blog for all the participation details HERE. The winner will be announced on March 31 and some Honourable Mention blog badges are up for grabs too! 

The hop will close at NOON PST on March 30th and the winner announced on March 31st! 

One winner will be selected from all the entries & win a $20 gift certificate to spend at Lost Coast Designs!  There will also be some Honourable Mention blog badges to give !