Showing posts with label Distress Inks. Show all posts

Thursday, 25 January 2024

This week at Vera Lane Studio

 Hello everyone, 

for this week's Vera Lane Studio post I have made a postcard with the newly released 'Celeste'. She is looking at the stars with her cute dog. 


I made this card by colouring it with Distress Oxide ink and Distress Ink. I swiped the ink pads over the paper until I was happy. I then added some white paint with a brayer and glued a piece of patterned paper over the bottom. I then printed and coloured the images, cut them out and placed them on the card together with the sentiment. 

You'll find Celeste HERE

Thank you for stopping by ! 


Saturday, 25 February 2023

You just have to care

 Hello everyone, 

Today I am sharing the second of my "Be sentimental" projects for February's challenge over at Country View Challenges. On this postcard I have used a sentiment I found on the internet and typed it on my old typewriter. It's very sentimental! 

We hope you will play along with us and maybe you will be the one to win the £20 voucher to spend in the shop! Just make sure to read the RULES


Here's how I made this. 


Coloured my piece of watercolour card with Distress Inks. I smooshed them onto my craft sheet, spritzed with water and dunked my card into it several times, drying in between layers, until I was happy.


Next I used these Katzelkraft background stamps and stamped the background randomly using the same Distress Inks and a grey and black Versafine Clair. 
Country View Crafts have a good selection of Katzelkraft stamps.


Next as always I toned it down with white acrylic paint and a brayer. 


I used a very old stamp for the main image. I stamped her on the card and onto some watercolour paper. 


I coloured the strands of her hair outside of the face straight on my card and the rest on the seperately stamped one. I then cut around the face on the right and around the hair on the left getting a complete image again by gluing it down onto the stamped image on the card. 


Next I added some Tim Holtz washi tape to sort of ground her. Not sure that was the right thing to do.. 
I also typed my sentiment en cut it into strips and glued it onto the card. 


Lastly, I went around the words and around the edges of the card with a graphite pencil and matted the panel onto some black card stock to make it pop! 

Thank you for stopping by today ! 


Monday, 9 January 2023

Happy Birthday

 Hello everyone, 

I am back with the second project for the first Challenge over at Country View Challenges for this year. The theme is Time/clocks and was set by Evelyn.


Here's how:


Started with stamping this stamp by Tracy Evans for AALL & Create. (#733 - Temporal)  I stamped the butterfly another time to layer of the top. 


Coloured the butterfly with Distress Ink re inkers and a brush. I then cut it out. 


The background was watercoloured with a mixture of Distress Inks and watercolours. I kept adding layers until I was happy.


I layered the butterfly on top and added shading around it so it looks to stand out. 


I added a sentiment, another set by AALL & Create , this time by Janet Klein. (#666 Every Day Sentiments) 
I matted the panel on some grey card stock and then adhered it to the card. 


We would like it if you played along with us! You could win a £20 voucher for the shop. Just remember to read the RULES before you enter ! 

Thanks for stopping by today ! 


Thursday, 1 December 2022

Warm Christmas Wishes

 Hello everyone, 

Today starts a new Challenge over at Country View Challenges and the theme is Christmas. We hope you all play along with us ! Just remember to read the rules before you do! For my first project I have made a Christmas card; well we all need them, don't we?


Here's how:


I started with stamping the snowflake all over the card. I used VersaMark ink. I then heat embossed them with white powder. Next I blended three blue Distress Inks over it creating an ombre effect. I also splattered some water over the ink to get some lighter areas.


Next I used these stamps to add more interest to the card. 


I then stamped the girl and the two sentiments. I was planning on making one sentiment our of the two. I coloured the girl with Copic Markers. 


After adding some washi tape to the bottom of the card and doodling along the edges I glued everything in place. I then glued the panel to a white card. 

All stamps I used are by AALL & Create. Washi tape from my stash. 

Thank you for stopping by. 


Tuesday, 28 June 2022

Too glam to give a damn!

 Hello everyone, 

It's Tuesday again and that means another project for AALL & Create from me. I love Miss Dee as you know so I used the, what to me is, the original Miss Dee and by far my favourite! 


I think she is totally fabulous ! 

Here is how I made this card:


I used this stencil to make the background. I used the biggest circle in the stencil. To make sure I only used that circle I taped it off with masking tape. I then just used a blending tool and Distress Inks to make the circles on the paper, making sure to overlap them here and there. I used Mustard Sees, Salty Ocean and Picked Raspberry inks. 


Next I stamped the background using the same inks to get a tone on tone effect and some black. I then toned it down with white paint and a brayer, see next photo.


I added some black ink around the edges of the paper and placed some washi tape for her to stand on and in the top right corner for balance. 


I then stamped Miss Dee on my project and on a piece of card. I also stamped the sentiment I wanted to use. 


And here she is in all her glory!


I have used :
Stencil:
 #87 - Totally Dotty by Autour de Mwa

Stamps:
#704 - Miss Dee by Janet Klein
#338 - Background Noise by Janet Klein
#523 - Flower Pops by Janet Klein

Washi tape: 
#17 - Mix & Match by Janet Klein

For more information about all the fabulous AALL & Create products, please visit:


Thank you for stopping by today ! 


Tuesday, 3 May 2022

Viola

 Hello everyone, 

It is Tuesday so that means another project for AALL & Create. This time I have made an AJ page.


Here's how I made it:


I started with a piece of watercolour card stock 6 x 6 and stamped the viola on it. I coloured it with watercolours. This is slightly unusual for me as normally I colour with Copic Markers and also cut them out and later adhere them onto my page. 


A close up...


Next, I stamped the circles three times and also watercolored them. I wanted to use them as collage pieces on my project. 


Next, I added the colour to the background with watercolours and a brush. When this had dried I added some Distress Ink (Vintage photo) with a blending tool. The white spots are waterdrops. I then added a stencil print; this is when you rub the stencil with ink (Distress Oxide - Vintage Photos in this case), spritz with water and then print it on the project. 


I then added some stamping on the background for more interest. 


I rolled over some white paint with a brayer and added some washi tape. 


Next I took the text stamp from this set and added it to the background tone on tone. 


Lastly I added the circles, the sentiment and some doodle lines along the sentiment strips and the edges. 


I have used :

Stamps:
#624 - Crocus by Tracy Evans
#400 - Numerator by Tracy Evans
Stencil:
#45 - Digital Bubbles by Autour de Mwa
Washi tape:
#7 - 25 mm by Autour de Mwa

For more information about all the AALL & Create products, please visit:


Thank you for stopping by ! 


Monday, 1 November 2021

Merry Christmas!

 Hello everyone, 

It is the first of November and that means another Challenge at Country View Challenges. This time it is the lovely Miriam hosting and she chose the theme "Christmas Gifting". 

For the first project I have made some gift tags. Of course there is a video too. 


If you'd like to see me making these then hop over to my YouTube Channel


or click on the pic below:


Thank you for stopping by, I will be back soon with project number 2! 


Tuesday, 23 March 2021

Original - an art journal spread

 Hello everyone, 

It is Tuesday so it must be time for another post for AALL & Create. I have made an art journal spread for today and it turned out a little grungy, just like I wanted it to... 


and here is how:


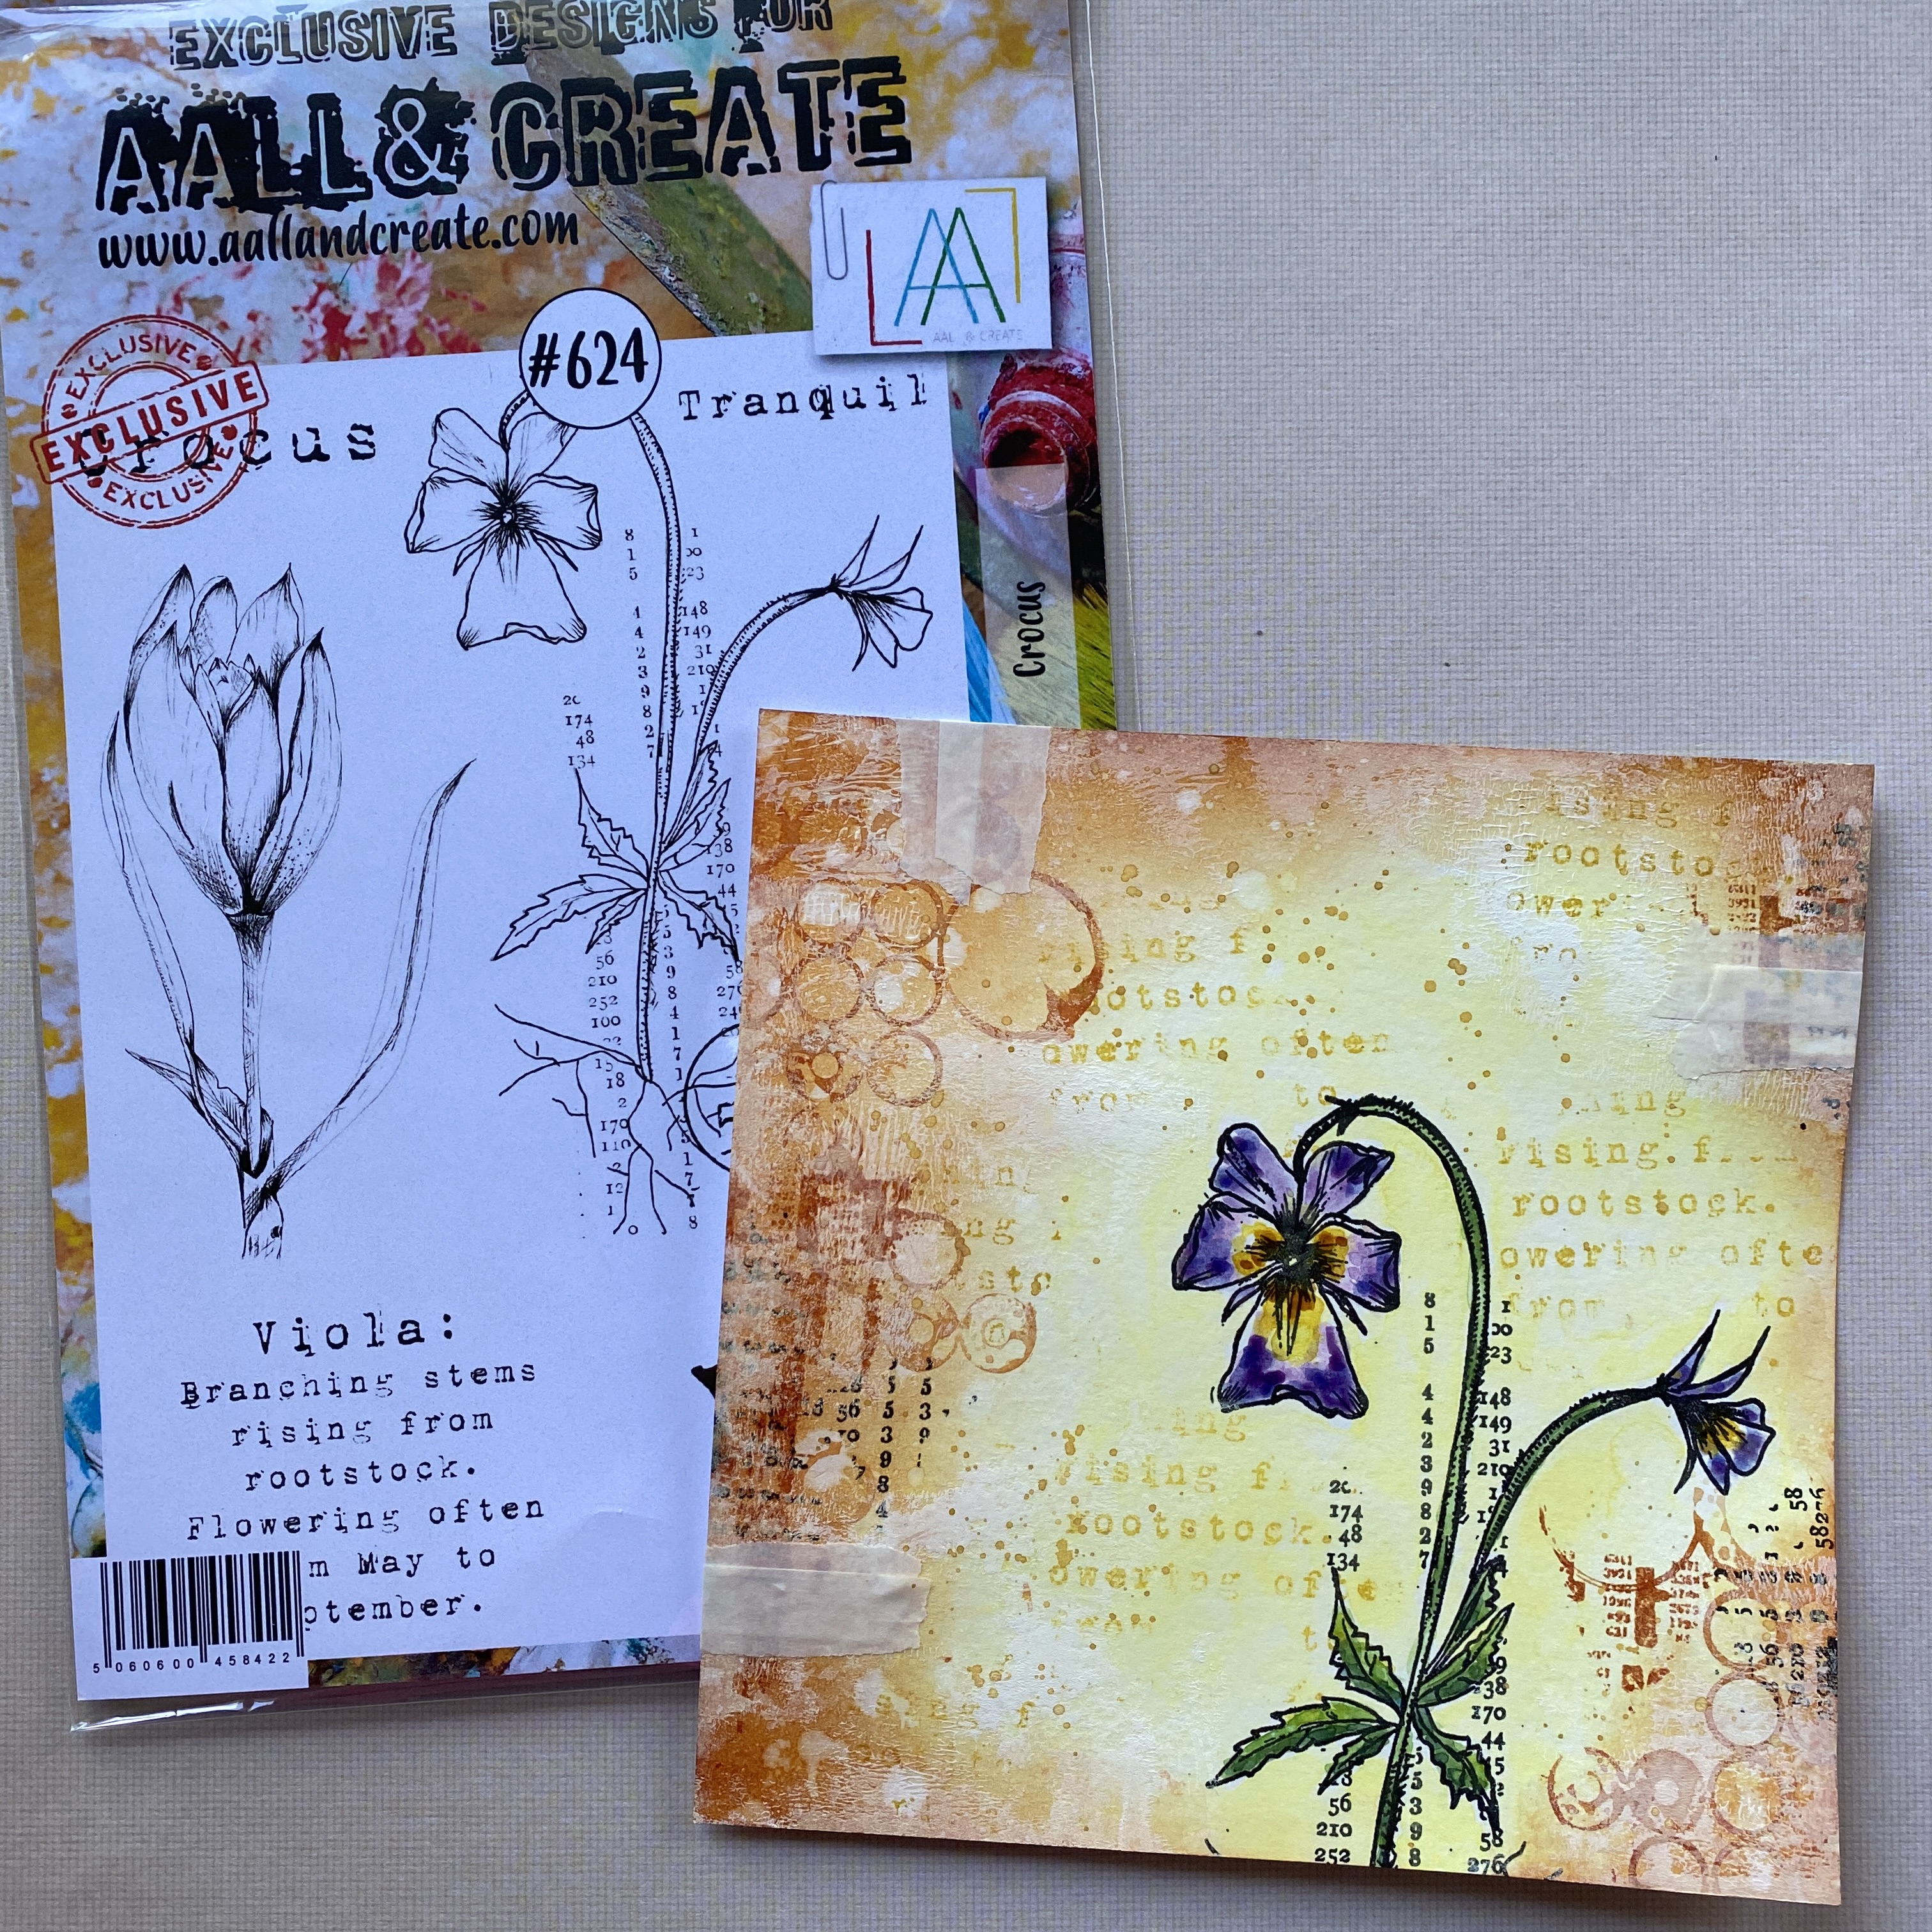
I started with stamping the main images because I wanted to keep those areas just for the flowers, so I could colour them with watercolours. I didn't want any texture paste and inks on those spots. This way I could work around them. 


I did the same for page 2


Next: Texture paste with stencil #39 Lotza Dotz, still one of my favourite stencils. 


Next I added some washi tape from the new release.


I then added Distress Oxide inks; I used the refills but that was not a good idea as it was way too concentrated. I kept spraying water on it to try and dilute it/make it lighter. In the end it was alright and I proceeded drying it. After that I used a beige and white acrylic paint to brayer over, to make it look nice and grungy. 


I then added stamping using the same Oxide inks I used for the background and some black VersaFine Clair ink. 


After that I coloured in the flowers, using reinkers again but now the regular Distress Inks of which I put one drop in a pallet. I used Faded Jeans and Chipped Saphire and a little Peeled Paint for the stem. 


Lastly I put on two word chips to form the sentiment. I added some blue ink to them to and went around them with a black pen. 


Here is a closeup of page 1. 


..and page 2. 

I have used the following AALL & Create products:

Stencil #39 - Lotza Dotz by Autour de Mwa
Stamp #452 - Astrantia by Tracy Evans
Stamp #350 - Splattered numbers by Tracy Evans
Stamps #366 - Roundly by AUtour de Mwa
Washi tape #13 - Fasteners by Bipasha Bk

For more information about all the fabulous AALL & Create products including a list of worldwide stockists, please visit:

www.aallandcreate.com/boutique

Thank you for stopping by today !