Thursday 30 July 2015

Trio of ATC's

Hello everyone,

I have a  trio of ATC's inspired by Alice in Wonderland for you today. This trio was created as my DT post for Lost Coast Designs.


The backgrounds were coloured with Distress Inks and a blending tool after which I randomly stamped the cards. I doodled around the edges and added some washi tape. The images were stamped on white card stock, coloured and cut out. I adhered them to the cards. Lastly I created the sentiments with my old typewriter. They are (parts of) quotes from Alice in Wonderland by Lewis Caroll.

I used the following stamps :


You can get these wonderful stamps from Lost Coast Designs in the USA of if you live in Europe it might be easier to get them from Inkadinkadutchies

Thanks you so much for stopping by today !

Wednesday 29 July 2015

Happiness

Hello everyone,

Another Wednesday, another Challenge over at Stampotique. This week Kristen is our hostess and she chose the theme "Under the sea".  This is what she said :

"The ocean is my happy place. It is calm and soothing and I love the sound of the waves. So this week, I challenge you to create an ocean themed project. I can't wait to see what you come up with."

I decided on a tag for today and this is it:


This is a #8 Manilla tag on which I put some model paste through a stencil. When this had dried I put a layer of gesso on it. Next I used Lindy's Stampgang sprays to give it some colour.. I used 'Tilt a wheel teal' and 'Merry go round green'. These are both Flat Fabios so no glitter. 
I stamped the background lightly with a text stamp. 
Next I stamped the 'seaweed' on book text, cut it out and glued it on the tag. Reggie and Rudy were next. I stamped them on white card stock and coloured them with Copics, cut them out and adhered them too. Lastly I used one word of a sentiment and put a ribbon through the hole.

I used the following stamps:


Thank you for stopping by today ! Why not join us this week, you never know, you might win one of two $30 vouchers. Just remember : NO digi's and only one entry per person per challenge...
Good luck !!

Monday 27 July 2015

Nonsense !

Hello everyone,

Well, I had a good day despite all the rain we have been having... I have been crafting and besides the postcards I also made an art journal. Fair to say I did have some images already coloured and this one was one of those.  A quick and easy page !


I used my favourite way of starting a page; paint it with gesso and then use model paste (Prima Light Modelling paste)  through a stencil (Tim Holtz). I then used three colours of Lindys Stampgang Sprays. One Flat Fabio (without sparkle) and two Starburst Sprays (with Sparkle).  I love the effect they give. Next I tore some pieces out of an old book and coloured them with the same spray. When these were dry I adhered them to the page. I used a stamp from Prima (Finnabair) to stamp the background randomly and subtly. I had Alice by Carabelle Stamps already coloured and glued her in place. The sentiment is a quote from Alice in Wonderland and was handwritten. Lastly I doodled a few lines around the page.

Thank you for stopping by ! Your visits and comments mean a lot !

De Craftorij Zomer Challenge dag 51 - 55 / Postcard a day challenge day 51 - 55

Hello everyone,

When you read this I will still be on holiday... I have taken some of my crafting stuff so I could do a little whilst away. Today I have another 5 postcards to share....


Day 51 - Use a stencil 


Day 52 - Scrap a card without Mixed media  ( difficult for me :) )


Day 53 - Use scraps of (Designer) paper 


Day 54 - Stars


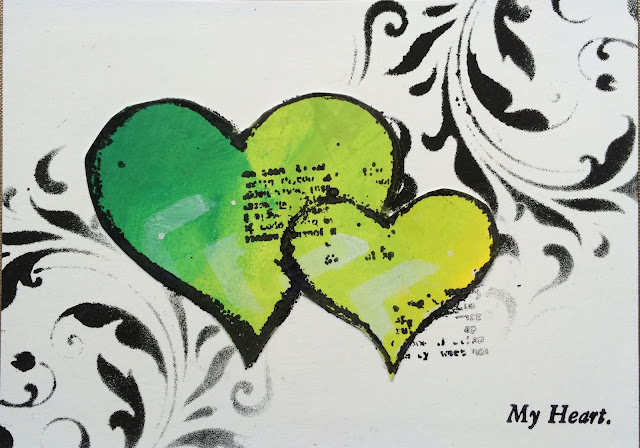
Day 55 - Heart


Thank you so much for stopping by ! 


Some people feel the rain....

Hello everyone,

It is my turn on the VLVS! blog today and I have made an art journal ! There are quite a few photos, so go have yourself a coffee and sit down and relax !


Here's the finished project.


Here is how I made this :


I started with a blank page in my journal and two colours of Distress Inks with a blending tool.


This was how it looked when I was done.


Next I took a stencil and a spray bottle of water .....


and got this result; neat isn't it?


I then used a some stamps, inks and some embossing powder too, to stamp the background..


This was the result. I stamps the 'tape X' with white ink but I could hardly see it, that is why I decided to heat emboss them with white embossing powder. It looks a bit rough but I quite liked that and left it that way... 


I then stamped the main image with black Archival ink...


I splattered some white ink on the page.... and tried to get some of the colour out of the girls face and arms and also her umbrella with a water brush; wetting it and dabbing it off. It didn't work very well. I think it is the paper in this journal... 


Next I stamped the sentiment twice....


the plan was to cut it apart and use the pieces, which is what I did...


Here's another look at the finished project... 


I used the following stamps:


Thanks for stopping by today ! 


Wednesday 22 July 2015

De Craftorij Zomer Challenge dag 46 - 50 / Postcard a day, day 46 - 50

Hello everyone,

Here are the next 5 postcards:


Day 46 - Messy


Day 47 - Fence


Day 48 - Use sweets wrapper


Day 49 - Use your favourite stamps


Day 50 - Flowers 


Thank you for stopping by, I hope you enjoyed them...

Happiness

Hello everyone,

and happy Wednesday to you ! Can't believe it is Wednesday again ! There is another challenge over at the Stampotique blog. Today Arwen is our hostess and she chose a theme that I love : Stamping your background with household items. This is what she said :

"Stamp a background with things on a budget, for example use sponges, foil or cutlery or something like that"

I used a cookie cutter, a fork and some bubble wrap for the background of my postcard.


I coloured the card with Distress Inks in the colours 'Worn Lipstick' and 'Peacock Feathers'. I used the craft sheet, ink, water, smooshing technique ! After it dried I put a stencil on and sprayed water through it which I then mopped up again. 
I then took my cookie cutter and diluted black paint and stamped it randomly. Also with white paint I stamped with the prongs of a fork. Lastly I took some bubble wrap and stamped with that too, I used the same Distress Inks for that. Next I drew some lines around the edges of the card. 
I then stamped Hunk, the Hat and the sentiment. I coloured the hat and Hunk and cut the sentiment apart. I arranged everything on the card and glued it down. 

I used the following stamps:


Why not play along with us this week and you might just win one of two $30 vouchers for the online shop HERE!
Just remember: No Digi's and only one entry per person per challenge ! Good luck ! 


Thursday 16 July 2015

De Craftorij Zomer Challenge dag 41 - 45 - Postcard a day - Day 41 - 45

Hello everyone,

Here is the next helping of postcards:


Day 41 - Castle


Day 42 - draw or paint a pig


Day 43 - Use a bit of fabric


Day 44 - Use Gesso 


Day 45 - Make something with the letter 'A'. 


Thank you so much for stopping by ! 


Wednesday 15 July 2015

Yellow brick road

Hello everyone,

Wednesday again ! Stampotique Challenge day ! Yay ! Today's hostess is the lovely and talented Janet. She chose 'Twinchies' as her theme and this is what she said :

"Twinchies are small works of art that measure 2" x 2". Create a set of twinchies using your favourite Stampotique Stamps."

So, that's what I did ! And I decided to use the lovely Wizard of Oz stamps designed by Janet !


First I created 5 Twinchies. I stamped some of the Wizard of Oz characters on them,  coloured everything with my Copics and doodled a little black line around each of them. Next I took my journal and painted a page in a light yellow acrylic paint by PaperArtsy. Next I used a stencil and a dimensional paint, with a bit of glitter in it,  from Art Anthology, to create the 'yellow brick road'. Once that was done and dry I randomly stamped the background. The sentiment was made by using the letter stamps on white card stock. I used the same stencil and drew a rectangle around each letter before cutting them out with my scissors. That way they are all the same size. I also drew a black line around each square. I then put everything together on the page ! 

I used the following Stampotique stamps :


Why not play along with us this week and you might just win one of two $30 vouchers to spend in the Stampotique Online Shop HERE !

Tuesday 14 July 2015

Why hello !

Hello everyone,

Yay, I have made it onto the VLVS! DT again and I am so very excited about this. It is such a nice DT and the stamps are fabulous ! For my first DT post in the new term I made a postcard. It is supposed to be a bit creepy but I am not very good at creepy so you might think it isn't ! lol


I used a background that was in my stash. Every now and then I will just make backgrounds for future projects. I don't use them every time but when I am strapped for time or when it is just the colour I am looking for I will use one. Today this one just was the right colour. 
It was made with water and Primary Elements. So pretty... 
I started with stamping the fence and the sentiment (I had already decided where the clown was going to go). I then stamped the background randomly. I also splattered some white ink on the card. (There is a full list of stamps I used at the bottom of this post). The clown was stamped on white card stock and on the card directly. I coloured him with Copic Markers and cut him out. I adhered the image to the card. The flower on the hat of the clown was stamped in yellow ink, doodled on and cut out. I adhered it to the image on the card. A white pen was used to doodle around the sentiment to make it stand out a bit more. And that was it ! 

I used the following stamps :


Thank you for stopping by today ! 

Sunday 12 July 2015

De Craftorij Zomer Challenge dag 36 t/m 40 - Postcard a day Challenge day 36 - 40

Hello everyone,

Here's the next instalment for the Postcard a day Challenge. I can't believe we're two thirds through it already !


Day 36 - Use a stamp and a detail of the same stamp


Day 37 - Hair/hairstyle


Day 38 - Add a border


Day 39 - Use watercolours


Day 40 - Use light blue and purple

Thank you so much for taking the time to look ! 


Wilbur is going on his travels

Hello everyone,

Something totally different today... Wilbur has told me he is going on his holidays soon and he has asked me and hubby to go with him. We couldn't say no to that, could we.. So here he is in his holiday attire. He chose a pair of comfortable jeans, a sporty sweater and some sturdy walking boots...


And of course he also has a hat against the sun or maybe even against the rain... He is showing it here: 


So, in the next few weeks, Wilbur will be visiting lots of different places.... If you spot him on FB, leave a comment on my blog. There will be some goodies to win for one lucky person after he gets back. 

Have fun 'Wilbur-spotting'.......

Friday 10 July 2015

WOW, aren't these embossing powders fabulous !

Hello fellow Crafters,

Over at VivaLasVegaStamps!, we are having a bloghop together with WOW Embossing powders, isn't that exciting...

I have made two projects and the first one is an art journal page:


I started by painting this piece of paper, which I ripped out of one of my journals and actually quite liked the torn holes..., with Gesso.
I then used Fresco Paint from PaperArtsy in the colour Pumpkin Soup. This paint is very translucent and I lightly brushed it over the gesso and then took a baby wipe and wiped it away here and there so you get this worn look.
Next I used a stencil, an embossing ink in a dauber and WOW embossing powder. The dots at the edge of the paper are Black Glint, the next ones are made with a mix of the Black Glint  and Metallic Copper. I then moved on the the ones towards the middle of the page and they are done with Metallic Copper on it's own. The last embossing was done with the eraser of a pencil a VersaMark Pad and Earthtone Honey powder.
The Earthtone powder is almost the same colour as the background.

Next I took a black fine liner pen and doodled around all the dots. I also took my Archival Ink Pad along the edge of the paper and in places on the paper. This all adds texture and interest. I also did a little bit of background stamping, not too much as there was already loads going on.
Next I stamped the girl on white card stock and coloured her with Copic Markers, cut her out and adhered her to the page. I then used bits of another stamp to make the sentiment. ( A complete list of stamps will be at the bottom of this post). I used the same paint to go around the edges of the sentiment and doodled around them. Lastly I stamped the staples.


Here is a detail picture of the embossing..

I have used the following embossing powders from WOW:

 www.wowembossingpowder.com

Black Glint WS28R
Metallic Copper WC02R
Earthtone Honey WJ02R

I have used the following stamps all by VivaLasVegaStamps! of course:

www.vlvstamps.com

2411 Lady Swimsuit back

The second project I did was a postcard and this is it :


I painted the postcard with 2 shades of pink and a white Fresco paint. I then took a Tim Holtz stencil and put it onto my card and dabbed it with a Versamark Ink pad. I sprinkled WOW pink and  pink glitter embossing powder on it. I melted that and was quite pleased by how this turned out. I also stamped the Grunge 5 with VersaMark en embossed it with WOW Bright White embossing powder. Next I stamped the background randomly and took my black Archival pad along the edged of the card. (A list of stamps and embossing powder I used is at the bottom of this post.) Then I stamped the girl, coloured her and cut her out. I also stamped the Welcome to Fabulous Las Vegas in pink, blue, yellow and also black ink. Then I cut and pasted until it looked somewhat like the real thing.  I could also have masked and stamped but I guess I am lazy ! I put a layer of glossy accents over it to make it look a bit better as I didn't really like how this turned out. 
I used it anyway and all in all I think my postcard turned out OK. 


Here is a detail of all that lovely sparkle from the glitter embossing powder.

I used the following stamps:

www.vlvstamps.com

9335 Showgirl Arms Large
10644 Welcome to Fabulous
19569 Mesh Texture
19566 Bubble Wrap texture
19456 Grunge 5
19416 Waybill/Invoice Background

And the WOW powders:

 www.wowembossingpowder.com

Princess Pink WS36R
Fluorescent Tickled Pink WR10R
Opaque Bright White WL01R

Thank you so much for stopping by today ! 


Wednesday 8 July 2015

An art journal just for fun...

Hello everyone,

I will be going on holiday soon so I was very busy with working ahead for the DT's I am on. I have now finished with that so this afternoon I had time to play !! I made this art journal just for fun.


I gessoed a page in my art journal and used a stencil with model paste to create the swirls. When this had all dried I used Lindy's Stampgang sprays to colour the background. It is very shimmery but unfortunately you can't see it very well. Next I used a scriptstamp to make the background a bit more interesting. I used green Distress Ink for this. The Zebra gentleman was stamped on gessoed book text and lightly coloured. I cut him out and glued him on to the page. I though that this sentiment was very apt and I typed it out on my old typewriter, cut it in strips, inked the edges and glued the strips to the page. Lastly I doodled around the words and used an old credit card and black paint to put some black accents here and there along the edge of the page. 
I used only two stamps and they are both from Katzelkraft. 


Thank you for stopping by ! 


Handle with care..

Hello everyone,

Today is Stampotique day ! Yay.. Kathy is our hostess today and she wants us to use 'attachers'. This is what she said:


'Use attachers, the older the better. Thinking of eyelets, brads, staples, etc. Bonus points if someone uses all three. Extra super bonus points if someone attaches Stampotique images to each other'. 


I made a card for this challenge and this is it: 


The base is a gelli print. I randomly stamped the background first and then stamped Skiddy, coloured her and cut her out, leaving a white 'box' around her. I then cut this piece into three. The pieces were glued and stapled to the card. And because Kathi said to use as many attachers as possible I also put 3 brads through the panel. The sentiment was stamped last.

I used the following stamps:


Why not play along with us. You could win one of two $30 vouchers at the end of the month. Just remember : NO digis and only one entry per person per challenge. 

Thank you for stopping by today!


Tuesday 7 July 2015

Freaky

Hello everyone,

I have an art journal to share with you today. I made this for my DT post for Lost Coast Designs.


I used Model Paste, gesso and Pan Pastels for the background which was then randomly stamped. The word 'freaky' was done with a stencil which was given to me as a present ! (Thanks, you know who you are  ! I love it) The clown was stamped on white paper, coloured with Copic Markers, cut out and adhered to the page on top of a few bits of washi tape. The same washi tape was also used in the top left corner.

Stamps used:


Thanks for stopping by ! 

Monday 6 July 2015

A new challenge ...

Hello everyone,

Time for another Challenge over at the Lost Coast Design Challenge Blog. The theme is "Zentangle". I love Zentangle but only if others do it... lol. I have no patience for it. For this inspiration piece I did my best but it was very difficult...


I have used only on stamp which is Carmen's Verandah  'Rabbit Square'. I stamped it on the card and then used a black fine liner pen to create the Zentangles around it. I also stamped the rabbit on white card and coloured it with my coloured pencils. I used a grey pencil to shade the Zentangles here and there too. The rabbit piece was cut out and adhered on top of the image on the card and then I matted the whole card on some green paper. 

Thanks for stopping by today ! Come along and play with us this month; you might win some rubber!