Tuesday 31 October 2017

Happy Christmas


Hallo allemaal,
Hello everyone, 
Vandaag heb ik een kaartje voor jullie. Ik heb dit gemaakt voor Hobbycompleet De Duif
 Today I have a Christmas card to show you. 


Deze, niet zo traditionele, kerstkaart is gemaakt d.m.v. 'paper piecing'. Ik vind dit een leuke techniek. Je begint met het stempelen van je kaart paneel met de stempel die je hebt gekozen.
Vervolgens stempel je (delen van) dezelfde stempel op restjes designpapier en knip je deze delen uit.
Als je dat allemaal gedaan hebt kun je de uitgeknipte stempeldelen op je afbeelding op je kaart paneel plakken. Het is dus een beetje zoals een jigsaw puzzel. Ik vind het een leuk effect en hoop dat ik je inspiratie heb gegeven dit ook eens te proberen! Veel plezier hierbij !

I made this by paper piecing the image. For the peeps who don't know what this is I'll explain. You start with stamping the image of your choice on your card. You then stamp the same image, or parts of, on different pieces of designer paper and cut them out. 
When you have done this you can glue all these pieces on the image on your card. It is a little bit like doing a Jigsaw Puzzle... 


Materialen:
Stempel : Woodware FRS655 Snowflake Reindeer
Designpapier naar keuze
Een Marker om de sneeuwvlokjes in te kleuren
Archival Inkt in Jet Black

Leuk dat je er weer was vandaag !

Thank you so much for stopping by today ! 


Sunday 29 October 2017

All is bright ..

Hello everyone,

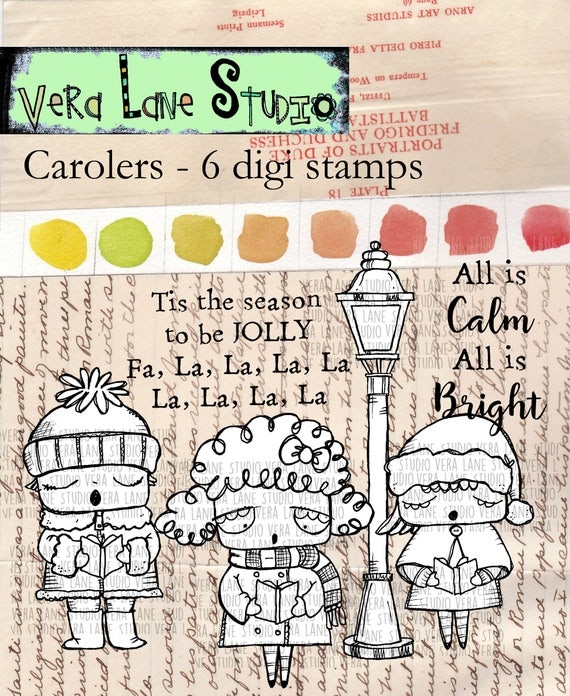
Happy Sunday ! I have a tag to share today. Vera Lane Studio's latest release is fantastic for Christmas. These little carollers are so cute !


This was a real good exercise in colouring too with the light from the lantern. The background was done with Distress Inks and a blending tool. the ground was done with Copic Markers as were the images. 

Anyway you'll find the carollers HERE


Thank you for stopping by today ! 

Saturday 28 October 2017

It's my life

Hello everyone,

and welcome to another project made with the lovely UmWow Chippies...

I have made an art journal page today and this is what it looks like :


And here's what I did with the chipboards:


I glued some of the Square Confetti pieces on a piece of Mixed Media Paper and gave them a coat of gesso. 


Next I added some model paste through this UmWow Stencil. 


This is what that looked like. 


Next paint. I used Titan Buff and Translucent Yellow Iron Oxide by Deco Art. 


Here's the result. I thinned the yellow down a little with water, applied it to the page and then spritzed it with water to get drips. 


Next some Stabilo pencil to grunge it up a little... 


Love the result... 


And here is the finished page. I added some stamping and the main image was stamped on tissue paper and adhered with gel medium. I doodled around the edges of the page with a grey fine liner and that finished my project. 


You can find the Square Confetti HERE


Thank you for stopping by today ! 


Wednesday 25 October 2017

3 ATC's

Hello everyone,

and welcome to the last project in the collaboration between Vera Lane Studio and Serena Bee ! 


I have made a trio of ATC's :


We are showcasing the fabulous digital images from Vera Lane Studio together with the fantastic Papercakes digital paper lines designed by Serena Bee
I used three different papers from the 'October Nights' paperback.

You'll find all supplies here:


Thank you so much for stopping by today ! 


Tuesday 24 October 2017

Snow is falling x 4

Hello everyone,

For Visible Image I am sharing 4 projects made with the fabulous "Snow is falling" and "Go To Christmas Words" sets. This is my last project for Visible Image as I am leaving the team at the end of October. It has been fun but it's time to move on.....


A tag made with Lindys Spray inks and white embossing powder. 


I added some Stickles to this silver heat embossed snowflake and sentiment and framed the words with glitter tape. 


This snowflake was stamped 3 times with different colours of Distress Oxide inks and then heat embossed with Holographic embossing powder. 


This card has a Distress Oxide Background and some ribbon and vellum added. 


I have used the following stamps:


Social Media links..
Shop where you will find all our awesome stamps!
Blog see all our latest posts here!
Facebook group join in with the banter and enter our ‘Show & Tell’ Monthly Challenge!
Facebook PAGE …give us a like and enter our weekly giveaways!


You can also follow us on:

Thank you so much for stopping by today ! 


Monday 23 October 2017

Born to be wild

Hello everyone,

and welcome to my blogpost for VivaLasVegaStamps! I have made an art journal spread this time.


I gelli printed the background straight in my journal using acrylic paints and stamps to get some texture.. 


I also stamped the background and added some stencilling and doodling. 


This bird is still one of my favourite VivaLasVegaStamps! Stamps. 

I have used the following stamps for these pages:


Thank you so much for stopping by today ! 


Sunday 22 October 2017

A wee bit wicked

Hello everyone,

and Happy Sunday ! For Vera Lane Studio today, I have another Halloween themed postcard with Nurse Dee. I love Nurse Dee, her facial expression cracks me up. This time though I played swapsies.. I have given her a pumpkin head !


Isn't she fun !!! 
The background is a gelli print and Nurse Dee and the Pumpkins were printed to size, coloured with Copic Markers and cut out. I then adhered them to the card. I added some shading under them to 'ground' them too. Lastly I added the sentiment. 
I have used the following sets for this card :


And the sentiment is from Lil Tricksters


I hope I have given you some inspiration to try and swap some images around, it is great fun ! 

Thank you for stopping by today ! 

Thursday 19 October 2017

Say cheese

Hello everyone,

Today I am sharing a tag that I made for Katzelkraft. I thought the look on this cat's face was priceless and went fabulously with the sentiment. He didn't want to smile !


I started off with a piece of card stock that I cut into a tag shape and added a layer of gesso to. 
Next I collaged some paper onto it. This was kindly gifted to me in a swap. The rest of the background is Distress Oxide ink in the colour Iced Spruce that I applied with my fingers. I then stamped the grungy circle with the same ink. The result is very subtle. 
Next I stamped, coloured and cut out the cat and adhered him to the tag. I added some shading, the sentiment and the ribbon and lastly doodled around the edges. That finished the tag. 

I used two stamps : 


Thank you so much for stopping by today !


Wednesday 18 October 2017

How long....


Hello everyone, 

and welcome to this collaboration between Vera Lane Studio and Serena Bee ! 


We are showcasing the fabulous digital images from Vera Lane Studio together with the fantastic Papercakes digital paper lines designed by Serena Bee

This is my third card :


I used Morticia and Gomez and I put them on a piece of black and white paper from Serena's October nights paper. 

You will find both items when you click the links: 


Thank you so much for stopping by today ! 


Yeah

Hello everyone, 

Hallo allemaal, 

and welcome to my weekly post for Hobbycompleet De Duif. I have made a small art journal page for today and this is it:

Welcome op mijn blog waar ik vandaag een kleine AJ pagina deel voor Hobbycompleet De Duif. 


I started with a piece of watercolour card and painted it with Dylusions paints. I used two of the new colours and applied them with a blending tool. Next I used the new Dylusions stencil and stamp. First I stencilled the leaves and then stamped the stamp over the top. It doesn't quite line up but I like that. 
Next I added some details with a white pen. 
I then stamped on of the Hipsters from Tim Holtz on watercolour card and coloured him with Zig Clean Color Real Brush Markers. He was then cut out and adhered on a die cut circle of book paper. I doodled around the edge and adhered it to the page. Lastly I splattered some white paint and added the sentiment that came from the same set. 


Op een stuk aquarelpapier heb ik de 2 van de nieuwe kleuren Dylusions verf aangebracht met een blending tool. Daarna heb ik hierop de blaadjes gestencild en gestempeld; deze komen uit een nieuwe set, ook van Dylusions waar je een stencil en stempel in dezelfde set krijgt. Het feit dat het net niet overeenkomt met elkaar vind ik juist leuk. Ik heb daarna met een witte pen wat accenten aangebracht. 
Vervolgens heb ik de aap van de Tim Holtz Hipster stempelset op aquarel papier gestempeld en ingekleurd met Zig Clean Color Real Brush Markers en daarna uitgeknipt. Ik heb hem op een gestanste cirkel van boek papier geplakt en daarna op de AJ gelijmd. Als laatste heb ik met een witte verf marker wat gespetterd and het woord "yeah" uit dezelfde stempelset aangebracht. 

Materials/ materialen:

Thank you for stopping by today ! 

Leuk dat je er was vandaag ! 
 

Sunday 15 October 2017

Happy Halloween

Hello everyone,

and happy Sunday to you. Today I am sharing an Art Journal page that I made for Vera Lane Studio.
I have used the latest release which is called 'Skullies' and it perfect for Halloween. There are 12 images in this set ! I have used 4 of them.


I used a gelli print and die cut the ovals out. I then lined it with white card stock. The skullies were printed to size, coloured with Copic Markers and cut out. I then adhered them in the ovals. The sentiment came from another set. 

Here are some close-ups:


You will find them here :

Skullies

Thank you so much for stopping by today ! 

Thursday 12 October 2017

Dreams

Hello everyone, 

Hallo allemaal, 

Today I have an inspiration piece for the October challenge over at Hobbycompleet de Duif. The theme is 'Make a triptych' so that is what I did. 
Vandaag heb ik een inspiratie project voor de uitdaging van oktober bij Hobbycompleet De Duif. Het thema deze maand is 'Maak een drieluik' en dat heb ik dus gedaan ! 


I started off with Mixed Media paper out of which I cut 6 labels. Three of these I painted with Fresco Finish Chalk Acrylics by PaperArtsy and a brayer. When this was dry I used a Tim Holtz stencil and some Distress Oxide but this layer has almost disappeared... Next stamping; I used Archival inks and paints for this. Bowtie was stamped on book paper and cut out, adhered to the middle tag. I added some shading for him to stand on. The sentiment is made of Tim Holtz Small Talk stickers and I glued them to the rest of the book paper before adhering them to the tags. I hinged the tags with washitape which was sandwiched between the front and back tags. (That's where the other 3 tags went). That was it ! 
Dit drieluik is als volgt gemaakt : Ik heb eerst 6 labels gestanst uit Mixed Media Paper en 3 ervan  met PaperArtsy verf en een roller gekleurd. (Onder vind je een lijst van alle kleuren die ik heb gebruikt).
Toen dit allemaal droog was heb ik de achtergrond gestencild met een Tim Holtz stencil and Distress Oxide inkt. Daarna heb ik de achtergrond bestempeld; hiervoor heb ik gedeeltelijk Archival inkt gebruik en gedeeltelijk de verf. Wel, als je dit wilt doen, je stempels meteen na gebruik schoonmaken anders krijg je de verft er niet meer af.
Vervolgens heb ik "Bowtie" van Stampotique gestempeld op een pagina uit een boek, uitgeknipt en opgeplakt. De woorden zijn Small Talk Stickers van Tim Holtz en ik heb die op de rest van het boek papier geplakt alvorens ze op de labels te plakken.
Ik heb de labels aan elkaar verbonden door van dubbel washitape een soort scharniertjes te maken. Ik heb deze aan de achterkant van de labels geplakt en daarna hieroverheen de overige labels geplakt. En dat was het !

Materials:
Materiaal :

Strathmore Mixed Media Papier

Crealies CNLE LT 06 Label stansen

PaperArtsy Fresco Finish Chalk Acrylics:
Teresa Green
Granny Smith
Tinned Peas
Snowflake
Blue Oyster
Inky Pool
Tango 

Stempels:
Stampotique Originals - Bowtie 6059
Stampotique Originals - Head Clouds 6207
PaperArtsy ELB34

Tim Holtz Layering stencil Ornate THS076

Thank you for stopping by today !

Leuk dat je er weer was !

Find your tribe

Hello everyone,

welcome to my blogpost where today I am sharing the last tag of the scalloped tag book by UmWow Studio . I have all four done now.


Front


Back...

Here's how:


I used paint to add colour... 


This is the result..


Adding some stamping..


Looking good, I think... 


Heat embossing too ! 


Here's how that looks... 


I added the x's later as I thought it needed something more. Next I added some Sari ribbon and a piece of pattern paper... 


I used the same pattern paper to put the sentiment on.  Lastly I added the girl to the strip of pattern paper and ribbon. All stamps I use are by VivaLasVegaStamps! 


Here are all 4 tags... 


I used this chipboard tag book :


You'll find it HERE


Thank you for stopping by today !