Thursday 28 November 2019

An art journal page for AALL & Create

Hello everyone,

For this weeks Guest Design team post I have made an art journal page. You might have already seen this on Hochanda but today I am sharing it here; there is also a video if you'd like to see how this came together.


I love how this turned out and it was a joy to make. 

Here's how : (Link to video below the photos)


First I stamped the bicycle on acetate and cut it out, I used StaZon for this. 


I added acrylic paint to the page and then stamped both stamps partially on it. 


I also stamped some of the images or parts of them separately to colour, cut out and layer on my page. 


I used this stencil to print with Distress Oxides. 


Here is the finished project again. 


If you'd like to see the whole process then click HERE or on the pic below:


I have used :
Stamp #228 - Postbox and Phonelines by Bipasha BK
Stencil #38  by Bipasha BK

For more information about all the fabulous AALL & Create products, please visit:


Thank you for stopping by today ! 

This week at Vera Lane Studio


Hello everyone,

and Happy Thursday to you ! For today's Vera Lane Studio post I have made three little projects.


The first is a clean and simple card with this week's release called 'Be wise'. I just printed, coloured and cut her out before adhering her to a white card. I also used some pattern paper and a bit of washi tape. The word smart is from the sentiment. 


This little owl is also from the 'Be wise' set. He is so cute ! 
I printed, coloured and cut him out. Adhered him to the ATC after sticking a die cut on it which is his branch to sit on. A clippings sticker finished it off. 

You'll find the 'Be wise' set HERE


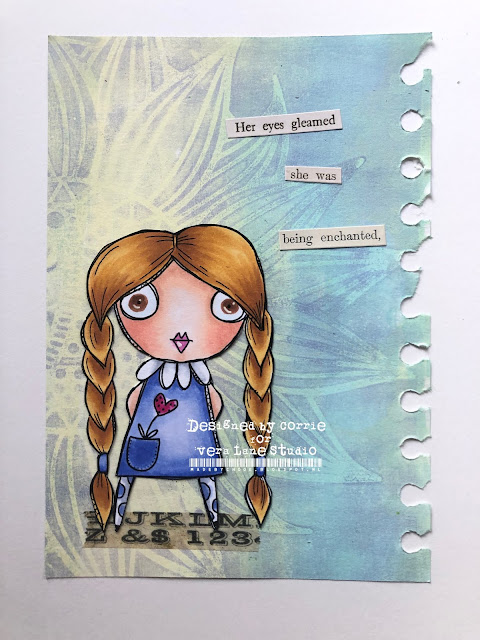
I also made a quick postcard with a piece of patterned paper and this girl which is from an older set called 'Besties' She is still availabe on request. Again I printed, coloured and cut her out and simply adhered her to a postcard sized piece of patterned paper. 

Thank you so much for stopping by today ! 


Monday 25 November 2019

A trio of ATC's

Hello everyone,

welcome to my post for VivaLasVegaStamps! today where I have a trio of ATC's to share with you.


I sprayed the cards with Distress Oxide Sprays, dried them and then randomly stamped them using different Oxide Inks and a VersaFine ink. Then I stamped the images, coloured them a little and cut them out. They were adhered to the cards. I then doodled around the cards and the sentiments. 


I used the following stamps:

other materials:
Watercolour paper
Distress Oxide Ink sprays: Picked Raspberry, Spun Sugar and Squeezed Lemonade
Distress Oxide Inks : Picked Raspberry, Weathered Wood, Fossilized Amber 
Versafine Clair: Nocturne
Bookpages
White paint pen
Black pen

Thank you so much for stopping by today ! 


Thursday 21 November 2019

Moments

Hello everyone,

for my weekly AALL & Create post I have made a card this time. I used a technique I had forgotten about until I saw Tracy use gesso and a stencil as a resist. I did basically the same but instead of gesso I used crackle paste.


So, here's how I made this card:


On a card panel that I cut out of watercolour paper I added crackle paste through this stencil by Olga. I then set it aside to dry. This particular crackle paste (DecoArt) doesn't crackle if you dry it with a heat tool. 


When it was dry I used Lindy's Stamp Gang sprays; one green then 2 blues over the top. This gives a subtle difference from the middle to the edges of the card. 


Next I used the bottom of this flower stamp and Distress Oxide ink in Cracked Pistachio to stamp here and there to add more interest. 


I also stamped the flower on watercolour paper and painted it with watercolours, adding the last details with coloured pencils and a white pen. 


Lastly I used dimensional tape under the petals and layered the sentiment on black card stock. I then put it all together on a white card. 

I have used the following stamp and stencil:

Stamp set #233 - Flower Moments by Tracy Evans
Stencil #53 - Florastella by Olga Heldwein

You'll find more information including a list of international stockists here:

www.aallandcreate.com/boutique


Thank you so much for stopping by today ! 


This week at Vera Lane Studio

Hello everyone,

Happy Thursday!  For today I have a little tutorial for you. I hope you like it and that you find it useful. If not, let me know!


You find the tutorial on my YouTube Channel HERE or you can click on the pic below. 


You'll find this fab girl from the set 'Haircut' HERE

Thank you for stopping by today ! 

Thursday 14 November 2019

A small journal for AALL & Create

Hello everyone,

For today's AALL & Create Guest Design Post I have made a small journal..


This was so much fun to make and here's how:


So, after die cutting Eileen Hulls wrapped journal I simply cut the flap that is on the right side off. I then added paint with some cut and dry foam. I used Dina Wakley's Heavy Body Acrylic Paints and these are my favourite colours. I then used the fabulous Lotza Dotz stencil and white acrylic paint to add the circles. I also used a brayer to add some more white paint here and there. You can see that in the next photo. 


Next, I stamped Bipasha's 'Postbox & Phonelines' stamp in two parts on the cover. I used my stamping platform but had to put it on the rubber side because I folded the journal closed to get it all in the platform. I used some masking tape to keep it in place. 


Next I stamped some more image from two other Bipasha sets on Mixed Media paper to colour and cut out. The idea is to collage them onto my book cover. 


Here's a pic with the stamp sets I used. One (#23) is an older one but I love the eye and the lightbulb. 
I also used the triangles as flags and the circles from the new stamp set (#231) as the wheels for the bicycle. 


Here you can see it all together. I also cut out the words 'friends and family' to add as a sentiment. Of course I had to add white splatters too. 


I love how it came out.. this is the front..


the back..


I put some signatures of paper in too and used elastic to keep them in place. I added some beads at the ends of the elastic.


The back once more.. 


I have used the following stamps:
#23 by Bipasha BK
#231 - Dial up by Bipasha BK
#228 - Postbox & Phonelines by Bipasha BK

Stencil:
#39 - Lotza Dotz by Autour de Mwa

For more information and a full list of worldwide stockists please visit:


Thank you so much for stopping by today ! 


This week at Vera Lane Studio

Hello everyone,

and happy Thursday to you ! For today's post I have made a journal page and a postcard.


This journal page was made with the set called "the Kiss" which was released this week. I coloured the images, cut them out and adhered them to a mop up page from the gelli plate from my stash. 

You'll find 'the Kiss' HERE


This postcard was made with another gelli print from my stash. I printed and coloured Contessa, cut her out and adhered her to the print after brayering on some white paint to make her stand out more. The sentiment is a word chip by Tim Holtz. 

You'll find Contessa HERE.


Thank you for stopping by today ! 

Monday 11 November 2019

I am not a bitch !

Hello everyone,

welcome to my blog where today I have an AJ page for VivaLasVegaStamps! to share. There is a video too if you'd like to see how I made this. 


I am not sure that I like it, lol, but these things happen!

Here's the video:


I have used the following stamps:


Other materials :

Dina Wakley heavy body acrylics: Turquoise, Lime
Amsterdam Acrylics : Nickel Titan Yellow, Titanium White
Distress Oxide Inks: Broken China, Twisted Citron, Worn Lipstick 
Versafine Clair Nocturne
Tim Holtz Flourish stencil
Coloured pencils 

Thank you so much for stopping by ! 


Thursday 7 November 2019

Tring tring

Hello everyone,

Welcome to my weekly AALL & Create post where today I have a 6' x 6' journal page to share.


One of the things I enjoy most is trying to match the different stamp sets together and when I saw Bipasha's fabulous new 'Phone booth elements' I knew I had to make a telephone out of two of the stamps and add it to Olga's grumpy cat. I did have to take his coffee cup away though; maybe that is why he looks so grumpy ! 

Here's how:

I painted a piece of white 6' x 6' card stock with green paint using a brayer. When it was dry I did the same with white paint, but a little more sparingly. I laid the stencil on the top and wiped away some of the paint with a baby wipe. When I was happy, I dried it and then used the same stencil but rubbed ink (Distress Oxide ink - Tumbled glass) over it, sprayed it with water and printed it here and there, just offsetting it slightly. 


Next I used this fabulous set by Aida for stamping the background using a variety of inks; mostly Distress Oxide in similar colours. I also used a black VersaFine Clair Inkpad.


Next I scraped a tiny amount of black acrylic paint along the edges to frame the page. I then added some modelling paste through this stencil. 


Next I stamped the elements and images that I wanted ready to colour.


I had to draw the phone wire but the rest are stamped images. I added some washi tape for him and the phone to stand on and added the sentiment. I didn't use the sentiment that comes with the cat in the end. 


I have used the following stamps: 

#211 - Count on you by Aida Domisiewicz
#237 - Phone booth elements by Bipasha BK
#254 - Safety first by Olga Heldwein

Stencils: 
#30 by Autour de Mwa
#27 by Kassa Haselden

For more information about all the fabulous AALL & Create products please visit:

www.aallandcreate.com/boutique

Thank you for stopping by today ! 


This week at Vera Lane Studio

Hello everyone,

Happy Thursday ! For today's Vera Lane Studio post I have made two postcards.


This card was made with the newly released 'What the fluff' set. She and her hat come separately so you can combine them or use them separately. I coloured her with Copic Markers and Pablo coloured pencils and cut her out. I then prepared the background; I sprayed a piece of card stock with Distress Oxide ink in Mowed lawn, added some stencilling, stamping and I used a brayer to put on some white paint and that was that. 

You'll find her HERE


This postcard was made with one of the 'Firefly Fairies',  I coloured her with my Copic Markers and cut her out. I used one of the backgrounds in my stash. I cannot even remember how and why I made this background. I found 3 similar ones... I added white paint with a brayer to tone it down, put some tissue paper down and then added some washi tape for her to stand on. I also doodled around the card. 

You will find the Firefly Fairies HERE.

Thank you for stopping by today ! 


Tuesday 5 November 2019

Reservations

Hello everyone,

It is time for the second inspiration piece for the Country View Challenge for November. The theme is 'use a hand stamped focal point'. I have made a mini art journal page this time. We would love it if you would play along with us. You will find all the details on the Country View Challenges BLOG.


If you would like to see how I made this then go to my YouTube Channel HERE or click on the pic below. 


Thank you for stopping by today !