Showing posts with label Sari ribbon. Show all posts

Tuesday, 9 August 2022

A time of wonders

 Hello everyone, 

It's Tuesday so that means another project for AALL & Create. This time I have made a mini album. I have used Eileen Hull's passport die by Sissix to cut out the book. 


Here's how I made this:


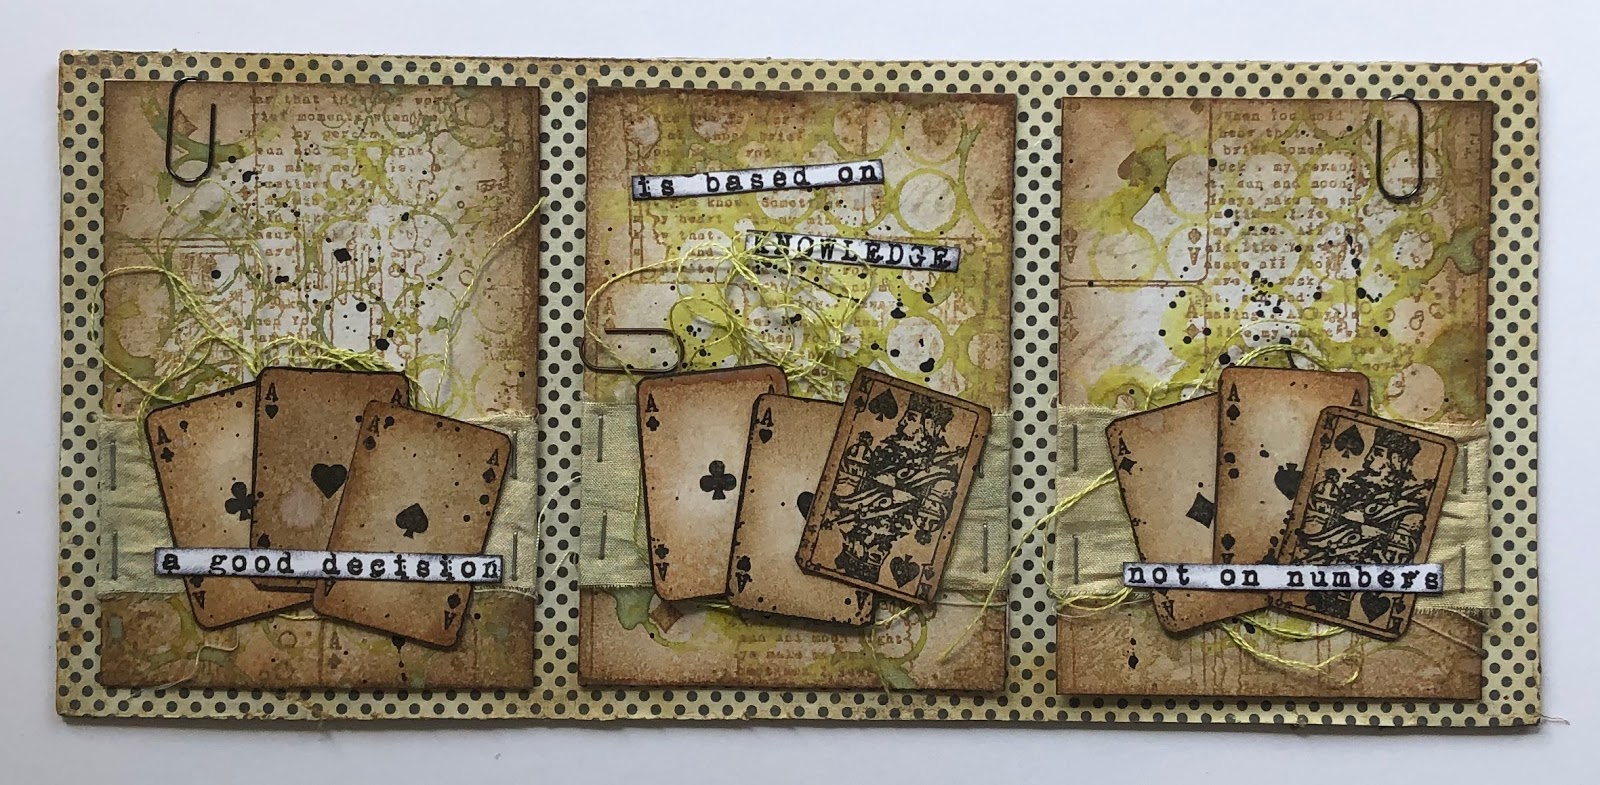
After die cutting the pieces for the book I stamped this image by Dominic on the front cover. This was a little more difficult than what I normally do because this image is impossible to cut out so I had to work with it straight on my project. 


Next, I used watercolours, watercolour markers and coloured pencils to colour in the image. 


I then used watercolours and Distress Ink to colour the background. When that all had dried, I added some stencilling and stamping. I added more later... 


I did the same with the spine of the book and the back cover. I just didn't add a focal image. 


Next I added some more stamping, some doodling lines and pieces of pattern paper for something different.. The sentiment is a clippings sticker and I added two double pages inside, attaching them to the book with sari ribbon. That finished the book. 


The back...


I have used the following AALL & Create products:

Stencil #39 - Lotza Dotz by Autour de Mwa
Stamp # 757 - Tickets  by Tracy Evans
Stamp #776 - Funghi Flowers by Dominic Phillips

For more information about the AALL & Create products and a worldwide stockist list please visit:


Thank you for stopping by today ! 


Saturday, 20 April 2019

A good decision....

Hello everyone, 

I was asked to make some samples for the Hochanda TV shows of AALL & Create on April 3rd and of course I made some. It is so satisfying to see your samples on TV! 

Today I am sharing a trio of ATC's.


and here's how:


I started with partially stamping this stamp on three ATC's. The paper I used is from an old Tim Holtz paper pad. 


Next I stamped the cards from the same stamp on a different paper from the same paper pad. 


I inked all the edges and then added 'stamping' with this stencil and Peeled Paint Distress Oxide Ink. I smooshed it onto the stencil, sprayed with water and printed it onto the ATC's. 


Next I added pieces of sari ribbon and used a tiny attacher by Tim Holtz to staple it to the cards. I added some embroidery thread and put the cards on top. They were inked along the edges as well. 


I used one of the sentiment from the Ladybug stamp as I thought it was quite apt to go with the playing cards. I also added some Tim Holtz paperclips for a bit more interest. The cards were then mounted on a piece of card board that i covered in patterned paper. 


I have used the following stamps:

#146 - Kings & Queens
#161 - Ladybug

Stencil: 

#45 - DIgital bubbles


You'll find more information on the fab AALL & Create products here:


Thank you so much for stopping by today ! 


Saturday, 3 November 2018

Under the sea

Hello everyone,

It is AALL & Create time again ! yay ! I have made a tag out of cardboard today and filmed the process too ! If you like to see how I made it, please hop over to my YouTube Channel (link below). I would appreciate your support by becoming a subscriber !


It turned out really nice I think, although I had some trouble with it..


This is what i used.


I stamped the little seahorse with Vintage Photo Distress Oxide and then coloured it with Copics. I then added some white highlights. 


Background finished. 


A close up..


The finished article. 


Here is the video :

You can click HERE to go straight to YouTube of go via the pic below. 


I have used :

Stamp set #125 - For the Record by Aida Domisiewicz
Stamp set #137- Underwater Wonders by Olga Heldwein
Stencil #39 - Lotza Dotz  by Autour de Mwa 

For more information about the fabulous AALL & Create products please visit:


Thank you for stopping by today 


Thursday, 26 July 2018

She was herself again.

Hello everyone,

I hope you are well ! A very warm welcome to my inspiration post for UmWow Studio ! I have made an Art Journal page this time and this is it:


This was great fun to make... here's how:


I used three of these shapes from the Doodle Mash; I wanted them to be rusty and used Finnabair's Rust Effect paste. 


This paste works quite well. 


Next I painted some '10 Seconds Studio' Iron paint in three blobs onto the page and added the patina spray. This then went rusty too. Yay, love a bit of rust ! 
When this had dried I glued the shapes on top to make it look like they were there for years! I then stamped the background a little using brown and blue ink. 
Next I painted an additional piece of paper with the same paint and did an image transfer with one of UmWow's new digitals. She is called 'girl with pearls'. I placed her onto some Sari ribbon and some book text and adhered her with some dimensional tape. 


I hope I could inspire you to make something with Chipboard! 

Here's what I have used:


Thank you so much for stopping by today !


Tuesday, 19 June 2018

All her dreams

Hello everyone,

Today, for my DT project for AALL & Create I have created a Mixed Media Mini canvas. It was so much fun to make. I used one of Fiona's little people for it and she looks fab !


And here's how:


I had wanted to use some corrugated cardboard on one of my projects for ages and today was the day! I used it to put little Juniper on. She's so cute ! 


First things first though.. I started with model paste and a stencil. This one was designed by Autour de Mwa and it is great. You can use the whole thing or just a little bit like I did. 


When the model paste had dried I coloured the canvas with spray inks. I used Lindys Stampgang sprays because I happed to really like those but you can use other inks too. 
I did mess about with it for a little while after I took this photo because I thought it was too green. 


After I was happy with the colour I splattered white paint on it. Next I painted the piece of cardboard with white gesso and stamped part of stamp #80 on it using Distress Oxide ink 'Peacock Feathers. I also went around the edges of the card board. Later on I added some more stamping with the same stamp and black Archival ink... 


I then coloured little Juniper. She will be wearing a nice turquoise frock and a pink necklace. 


Here she is all dressed and ready to go. 


I glued her onto the card board piece and gave her a bow in her hair made from Sari ribbon. I added atwo text stickers by Tim Holtz. I thought these two went really wel together. And there you have it ! 


If you are interested in any of the products I used then please visit www.aallandcreate.com/boutique where you'll find information and a list of worldwide stockists. 

I have used :
Stamp #85 - Juniper
Stamp #80 - Lined
Stencil #28 

Thank you so much for stopping by today ! 


Sunday, 3 June 2018

Dare to dream, a shadowbox for PaperArtsy

Hello everyone,

Last Friday I was featured on the PaperArtsy blog with a shadowbox.

The topic (#10) was Paperdolls and as soon as I saw this I had this vision of a paper doll sitting on a flower. So here goes :


This box was in my stash for years. It is a wooden box with a glass window from Ikea. I have no idea why i bought it. lol I started with taking off the back and obscuring the glass which was not removable. I got round that by putting a piece of paper inside the box and a piece of grey board on the outside. 


I made a paper insert for my box because it was easier to use the stencil and model paste like this. When I was finished with it, it just slid into the box. 


I also stencilled on the outside. 


I gelli printed some paper to stamp my flowers on. I used an Ikea coaster and some bottle tops to add texture into the paint. 


After stamping, I cut them all out. I did stamp more in the end... 


I used Fresco Finish Chalk Acrylic mixed with glazing fluid to add interest around the stencilling. 


To get rid of the ugly edge at the front (which was the back) I glued sari ribbon along it. 


And this is the finished project ! 

Love how it came out, loved making it.... 

I have used stamps and stencil by Kay Carley

Kay Carley's sets {EKC01} and {EKC08} 

and 

Kay Carley's stencil  PS061

You'll find more information on the PaperArtsy site HERE. 

Thank you for stopping by today !