Wednesday, 4 February 2015

Trio of Banksy tags

Hello fellow Stampers,

For my DT post at VivaLasVegaStamps! I have three tags to share with you. I love the VLVS! Banksy stamps and couldn't resist playing with them again. I have also used quite a few other rubber stamps, all VivaLasVegaStamps! You will find a complete list at the bottom of this post.


This is the finished result


Paint tags with gesso. Also gesso a piece of card stock for sentiments if wanted/needed)


When the gesso has dried, stamp the images with Archival ink and heat emboss. I used black embossing powder to get a real black image. 


Randomly glue (I used gel medium)  book text around the images and put a thin coat of gesso over it. Make sure you can still see the text. 


Use a stencil, model paste and a paletknife of old credit card and add more texture to your tag. 


After this has dried (you can use a heat tool) the fun can start. Use different spray inks to colour the tags. I didn't spray; I used a brush as, although the images repel the ink, when drying the ink with a heat tool you might melt some of the liquid into the embossed images leaving light spots. If this happens you can always touch it up with a black marker. 


The last thing you do is stamp the background, use a fine tipped marker to doodle here and there, splatter some white ink (avoiding the images),  adhere your sentiments (if using) and add some ribbon. I also used some plaster bandage for added interest. 

I used the following stamps : 


Thank you so much for stopping by !

I hope you like my tags and have inspired you to pick up some rubber stamps ! 

Tuesday, 3 February 2015

Love - Tim's tags of 2015 - February

Hello fellow Crafters,

For the February tag of 'the 12 tags of 2015' I have made this :


I started with a #8 Manilla tag and collaged over the top. I glued everything down with gel medium and also added a layer over the top. I then took some Big Brush Markers and shaded the edges of the collage pieces. I also took a grey Archival Ink pad and rubbed it around the edges of the tag. 
Next I stapled some ribbon across the tag. The hearts were die cut out of some felt and stitched together on the sewing machine. I adhered it to the tag with glue. The little rest bit of the ribbon was adhered under the heart as I quite liked that and I do not like to throw things away. The metal bits that I used were copper coloured so I used some silver embossing powder to give them a different look.  They were also adhered with gel medium as this is nice and strong. The last thing was the 14, which was glued to the round metal flower with gel medium. I put a layer of Glossy Accents over the top to make it shiny. 
A piece of ribbon finished it off. 


Here's a close up of the glossy accents over the '14'.


And another close up...


Thank you so much for stopping by ! 

I hope you like it and I have given you some inspiration too ! 


Doggie artjournal

Hello fellow Crafters,

Today I would like to share an art journal with you.  I used a stamp of a chair that I had for ages, but hadn't used at all yet.


The base page is a Gelli Print cut to the same size as a page in my journal. I stamped the background here and there and used a stencil with polkadots and white ink. I also adhered strips of pattern paper that I punched with a scallop punch and doodled around those with a black pen. 

The Chandelier, dog and chair were stamped on white card stock. I drew the flowers on the chair as it is plain. I coloured everything with Copic Markers, cut it out and adhered the dog on the chair and the chair and chandelier to my Gelli Print. I added washitape as a base for the chair to stand on and also here and there for balance on the page. Lastly I shaded around the chair with a Big Brush Marker. 

I used the following stamps (all Stampotique) :

That was it ! Thank you for stopping by ! 

Hope you like it and got some inspiration..


Monday, 2 February 2015

Love

Hello fellow Crafters,

I am taking part in the February Challenge of the Stampingback blog. The theme is, obviously being february: 'Love is in the air'.  I have made this card:


I have used the 145A Stamp sheet for this. I started out with a piece of white card stock on which I stamped the wood panels. Normally I would use brown for this but seeing as this is all about love, I thought I'd use pink Archival Ink to stamp this. I then used a pink Distress Ink to ink the edges of the paper. Next I used a heart die to cut out the hearts out of pink felt. I took them to my sewing machine and stitched through the middle. I then stamped the Pin Up that is also on this sheet and coloured and cut her out. I adhered her to the card panel. As I didn't have any suitable word or letter stamps from Stampingback I used the alphabet from Lost Coast Designs to stamp the word LOVE. Lastly I glued the heart on, matted the panel on black card stock and then glued the whole thing on a white card base. 


Thank you for stopping by ! 

Hope you like it ....


ATC trade "Nursery Rhymes" at the Stampotique Facebook Page..

Hello fellow Crafters,

Another trade is over and I am now able to share what I made for the January ATC Trade. You are supposed to make 2 ATC's; one for each of the ladies that are appointed to be your swap partners by Nikki Woodward. I also always send one to Nikki, as she goes to so much trouble organising it all and I make one for myself, so 4 in total.

I usually end up not liking the one I make first, so I make another and then end up sending both of them...
So here they are :


Baa Baa Black sheep, have you any wool ? These ATC's were made with a gelli print which was stamped and doodled on. The sheep was stamped separately and coloured, cut out and adhered to the card. The sentiment was typed on my old typewriter and cut into strips and glued on the card. 


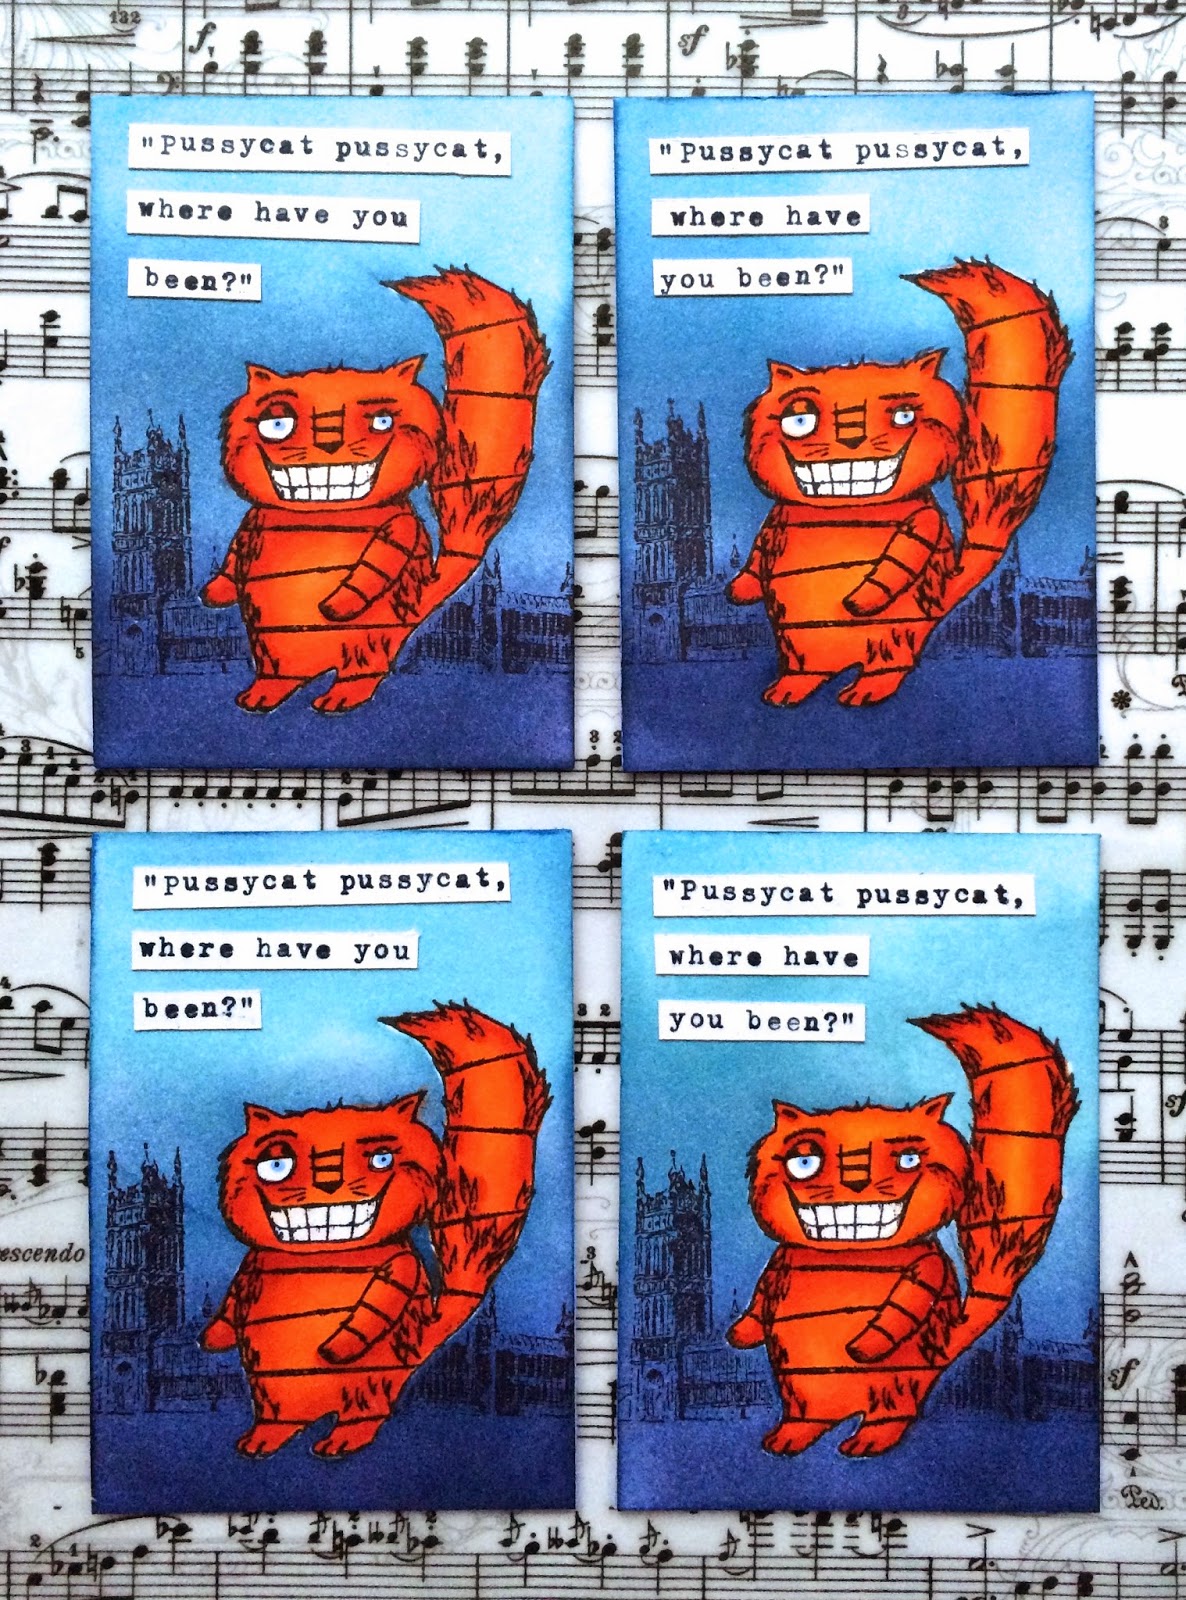
Pussycat pussycat, where have you been ? These ATC's were made with a masking technique. The cat was stamped directly on the ATC and again on masking paper. After colouring the cat I put the mask over it and used Distress Inks and a blending tool to add the background colour and stamp the London skyline. This sentiment was also typed, cut into strips and adhered onto the card. 

I also made cards to send with the ATC's : 


These cards are all made with gelli prints. The two on the left were a bit boring so I added a circle stamps and some white embossing powder to make them a bit more interesting. 
I used some more of my fingerprinted circles and stamped the little girl separately on white card, coloured her and cut her out. She was then adhered on top of a circle on the card. The sentiment was stamped directly on the card and embossed. Some splattering finished them off. 

All these ATC's and cards were made with Stampotique stamps apart from the London Skyline behind the cat and the circle background on the two left cards. 

Thanks for stopping by ! 


Sunday, 1 February 2015

Super Chickie

Hello fellow Crafters,

Some of you might have seen my new Tim Holtz Bird Crazy stamps on Facebook yesterday. Of course I had to play with them. So I made a mini art journal with a gelli print as a base.


As I said, I used a piece of a gelli print for this page and a whole load of stamps from different brands. There is Tim Holtz, VivaLasVegaStamps! and Paper Smooches. 
I cut the gelli print piece to size and adhered a little scalloped strip of pattern paper along the top. I then stamped the background with different stamps. When that was done I adhered two strips of washi tape for a bit more interest. 
Next I stamped this little birdie on white card stock. He looks like he is going to cry, doesn't he? That's why I couldn't resist him. 
I coloured him with Copic Markers and cut him out. I also stamped him directly on my page as it is almost impossible to cut out the legs and the little curls on his head. I adhered the cut out one on top of the stamped one. Lastly I made this sentiment up from a set with sentiments from Paper Smooches. 

Thanks for stopping by ! 

Hope you like it....

Dare to be different.

Hello fellow Crafters,

Can you believe it is the 1st of February already !  For my DT post over at Roc's Facebook page I made another postcard. I am addicted to making postcards I think. They are so much fun...

I can't get enough of this horse... although today he seems to be a zebra !


I started with a postcard that had the pink colour and doily on it already. It has been in my stash for quite a while now. I think it was sprayed with a Tattered Angels glimmer spray and then I had some model paste left over from another project and put that on through a doily stencil. While that was still wet I sprinkled glittering embossing powder over it and heat embossed it. It is so pretty; shame the sparkle gets lost in the photo ! 


You can see it a bit better here....

To start with I glued some pattern paper (Bo Bunny - C'est la vie) along the top left corner and some at the bottom. This was to put the horse /zebra on later. I then took it to my sewing machine and stitched around the card. 
Next I stamped 'Horse', minus his hat, on white card stock and coloured him, first with different greys to get the shady parts and pink for his nose and ears; then I took a black fine tipped pen and turned him into a zebra.... For the three flowers I used 'Daisy Head' which I stamped on patterned paper from the same paper pad and cut out.
I typed the sentiment on white card stock; I used my old typewriter for this. I then adhered all the elements on the postcard.

I used the following stamps, all by Roc Nicholas, sold through www.Stampotique.com.


Thank you so much for stopping by, I really appreciate your visits and comments ! 

Hope you like it...