Showing posts with label crinkle ribbon. Show all posts

Tuesday, 21 July 2020

Create happy memories

Hello everyone,

I hope you are all well.
For today's AALL & Create project I have made a little tag album. I used just inks, stamps and stencils. Oh, and a tiny bit of white paint for the inside of the album.


And here is how I made it:


First I took a piece of Mixed media paper from one of my A4 pads. I didn't measure it because I didn't think that was important. I folded the paper up about a third, again I didn't measure it. This flap is to become pockets for tags. 
To decorate my album I used two stencils and three colours of Distress Oxide Inks (Broken China, Mustard Seed and Picked Raspberry). I used the stencils to print. This is a very effective but easy technique where you rub the ink pad over the stencil and spritz with water, you then put the inked side onto the paper and blot with kitchen paper. 


After it was all dry I added some stamping. I didn't realise that the bottom right 4 would be upside down as soon as I folded the flap up. Oh well... lol 


This is the inside of the album and I added some more ink this time by putting the ink on my craft sheet, spritzing with water and dunking the paper in it. I repeated this until I was happy, drying the layers in between. I then added a bit of stencilling with white paint. I only decorated the top because the bottom will fold up over. 


I then used the same colours of ink to dye a piece of ribbon. 
Next I folded the 'pocket strip' up and folded the whole thing into four the other way. You can see my upside down 4 here. I then took it to my sewing machine and stitched over the fold lines to create pockets. I stitched the ribbons inside of the pockets left and right. 
That was my album done ! 


This is how it looks on the outside folded out. I did add some doodling as well. 
Now to work on the tags that will go inside the pockets. 


I decided to used the same stencil and the same colours of ink. I mixed the blue with the yellow for the second tag to get a greenish colour. I used the same technique by rubbing the ink pad over the stencil, spritzing with water and printing. 


When dry I stamped the background and did some doodling along the edges. 


Next, I stamped the focal images for the tags and coloured them with Copic Markers:


SO cute ! 


The finished tags. 


Here is what the book looks like closed (front).


and the back.. 


The inside with the tags in the pockets.. 


The girls peeking out.. 

I have used the following stamps and stencils:


Stencils:
#90 - Elegance by Olga Heldwein
#105 - Lotza Trianglz by Autour de Mwa

Stamps:
#350 - Splattered numbers - Tracy Evans
#366 - Roundly - Autour de Mwa
#376 - Recerse Triangles - Autour de Mwa
#354 - Bunny & Bunnies - Janet Klein
#358 - Paw Prints - Janet Klein
#379 - Party with me - Janet Klein
#380 - Rapunzel - Janet Klein

For more information about all the fabulous AALL & Create products please visit:


Thank you so much for stopping by today !

Sunday, 5 March 2017

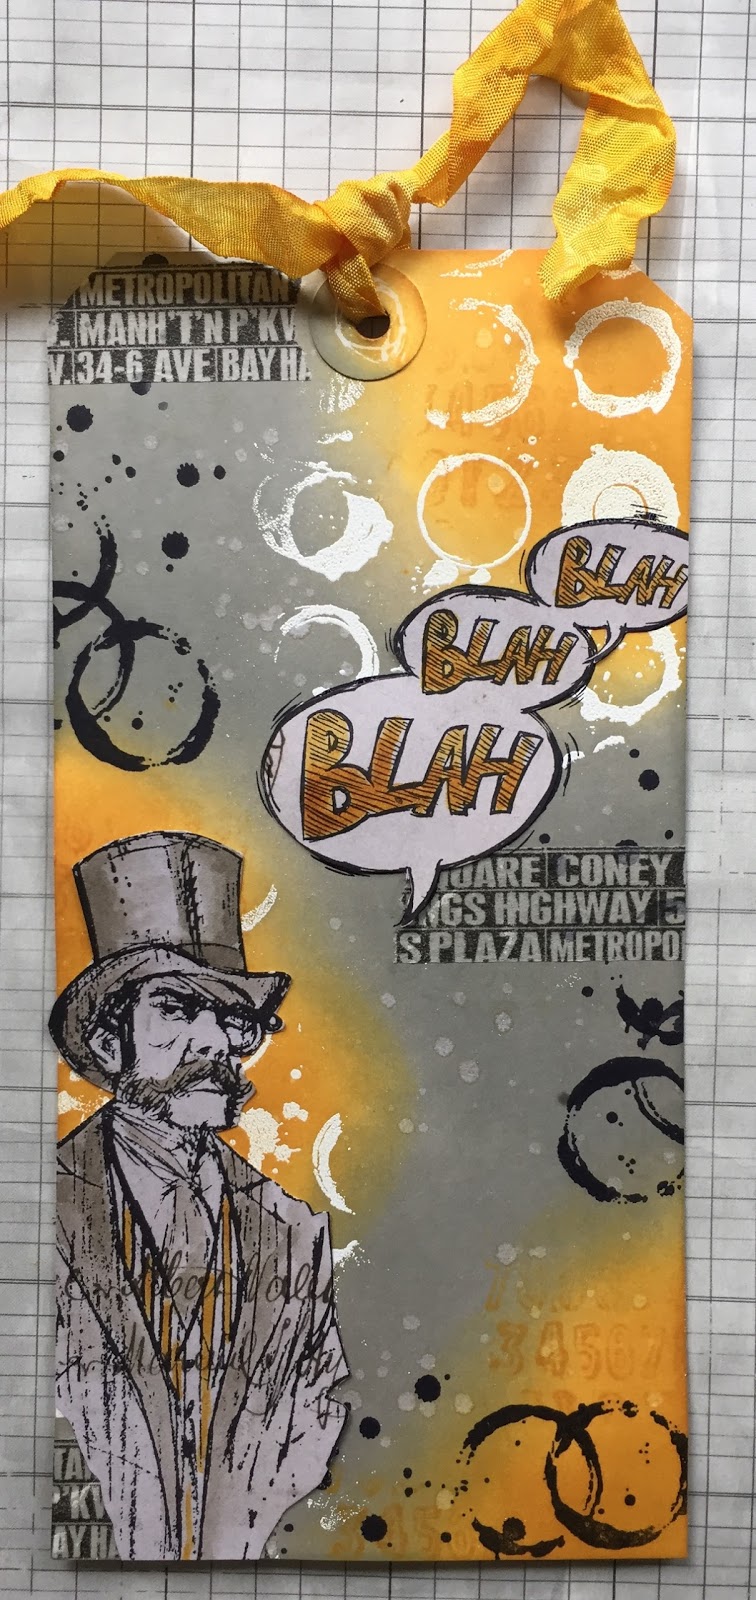
Blah Blah Blah

Hello everyone,

and welcome to my second inspiration post for this month's "inspired by Tim Holtz" challenge over at Country View Challenges. I have made a tag for this and almost everything I have used is by Tim Holtz. I am amazed at the amount of Tim-stuff I have in my stash to be honest ! lol


I hope you will play along with us this month ! You could win a GBP 20 voucher to spend in the shop HERE. Just make sure to read the rules.. 

Here's how I made my tag : 


Thank you so much for stopping by today ! 

Sunday, 4 September 2016

Who's bad - a new video

Hello everyone,

and welcome to my blog. I have made a tag and filmed the process so I could share it with you.
I have used a technique which I learned from Birgit Koopsen. She is a master in Gelli printing.
I hope you will hop over to YouTube and have a look. I would love it if you subscribed to my channel too !

I am entering this tag into the Craft Stamper TIMI challenge for the month of September.


Here is the video ! 


Thank you so much for stopping by today ! 


Tuesday, 3 May 2016

Follow your heart...

Hello everyone,

I have been accepted into the DecoArt Blogger Outreach Programm and I have made my first piece using mainly DecoArt Products and a few others.... I had lots of fun making this, experimenting along the way. I think the result is not bad !


This tag was painted with Cobalt Turquoise Hue acrylic paint. I then added some crackle paste through an Andy Skinner stencil and let that dry naturally. I you heat it with a heat gun, it won't crackle.. don't ask... haha..
Next I added a few antiquing creams, a bit of interference paint and some more antiquing cream to the crackled cornices, if you can call them that ! I really like the end result. 
Here are some close ups:


Doesn't that look yummy ! 
I also stitched around the edges with my sewing machine. 
Next I stamped the background. I used a stamp from a Mixed Media stamp set by Dina Wakley and white pigment ink for this. It dries back a little lighter which I really like in this tag. 
I then stamped the hearts (Unity Stamps) on the tag and onto some book text. 
I cut out the book text hearts and adhered them on top of the ones on the tag. 
The sentiment (which is only part of a sentiment by Carabelle Studio)  was stamped, like everything else with black Archival Ink and accentuated with a white paint pen. 
Lastly I added some whit and black splatters and a piece of ribbon coloured with the same Cobalt paint I used before. 

Thank you for stopping by today ! 


Tuesday, 16 February 2016

Shine bright

Hello everyone,

For my DT post for Visible Image today I have used another one of the lovely new stamp sets. This one is called 'Shine bright' and I have made a tag and a CAS card with it.


For this project I painted a tag with Dylusions acrylic paint. When this had dried I used a Tim Holtz stencil and red Dylusions paint to add the sunburst. I used a black Archival ink pad to stamp some script here and there and also to add some black around the edges. Next I stamped the light bulb on a piece of white card stock, coloured it with my Copic markers, cut it out and adhered it to the tag.  I added the word 'bright' which is part of the sentiment that goes with the bulb. Lastly I added some white accents here and there. 


I used the new stamp set 'Shine Bright' and a script stamp from the 'Revolution set'. 


This clean and simple card was made by cutting a panel of white card stock that was slightly smaller than the card. I stamped both the light bulb and the sentiment with Jet Black Archival ink. I made sure it was dry before adding Distress Ink in two shades of yellow with a blending tool. I then added some orange around the word shine. 
With a black fine liner I added a line and then filled it with this black and white pattern. The panel was then adhered to the card. 


For this card I only used the 'Shine Bright' Stamp set. 


You will find the lovely stamps of Visible Image HERE... 


Social Media, Blog and monthly Challenge details :


Show & Tell Monthly Challenge details: http://visibleimage.co.uk/challenge 


Thank you so much for stopping by today ! 


Saturday, 6 February 2016

Crime scene

Hello everyone,

Over at the Country View Craft's blog there is a challenge for making your own background. I usually make my own backgrounds and it is my favourite part of the project,  so this challenge was right up my street. And here is what I made:


This tag was cut out of white card stock and then painted with black gesso. I added crackle past by Deco art and let it dry naturally. I then used Deco art Antiqueing cream and some turquoise acrylic paint to add some interest. Next I stamped the background using a variety of stamps and Archival ink. 

I love these new Tim Holz stamps called 'Crazy Cats' and had to use another one... ( I had already made two ATC's with different cats from this set) I paired him with the wool which he obviously has stolen from his master's knitting basket... lol 
He and the wool were coloured with Copic Markers and adhered to the tag. The sentiment was stamped on a piece of book paper with no text on it and cut out. I added some of the same turquoise paint to the edges.  Lastly I added some shading under the cat and the wool and put a piece of Tim's crinkle ribbon through the hole.. 

Than was it ! Thank you so much for stopping by !