Showing posts with label Geli Print. Show all posts

Thursday, 20 April 2023

This week at Vera Lane Studio

Hello everyone, 

For this week's Vera Lane Studio project I have made a tag with the newly released 'Silence of growing things'.


I used a piece of gelli printed paper from my stash. The background was made with the Sunflower stencil from AALL & Create. I added a small amount of stamping and some washi tape. (Stamps used and washi tape by AALL & Create). I then coloured the girl and cut her out together with one of the sentiments of the set. I placed her and her watering can on the washitape and that was that ! 

You'll find this green fingered lady HERE. 

Thank you so much for stopping by ! 


Thursday, 9 August 2018

A prickly post !


Hi everyone,

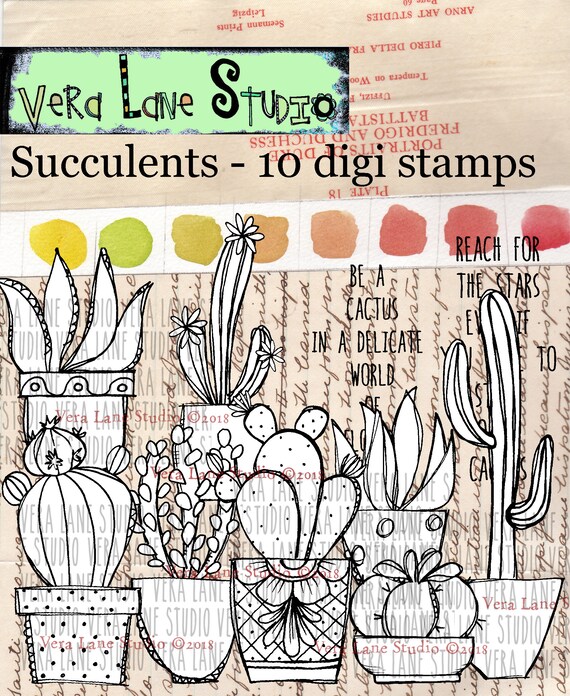
Today for my Vera Lane Studio post I have made an ATC and an Art Journal page. I have used the 'Succulents' set that was released this week. I love them ! 


This ATC was made with a piece of gelli printed paper from my stash. I added some stamping and washitape before adding the cactus. I coloured it with my Copics. The sentiment is from the same set. 


I really enjoyed colouring these plants but when I finished I spent ages to find a background that I liked. I painted one, threw it away because I didn't like it, tried gelli prints from my stash, didn't like it. In the end I found this 12 x 12 paper in my stash and decided that it looked  nice, especially with the sentiment. So I cut a piece to fit my journal and added washitape to put the pots on. After gluing the plants in place and the sentiment too I declared it finished :o) ! 

You'll find the set HERE. 


Thank you so much for stopping by ! 


Thursday, 24 August 2017

Is it wine o'clock yet?

Hello everyone,

and welcome to my blogpost for Katzelkraft. I have used one of the dogs today because they are so cute. This one is having a coffee but I think he is not too happy about it...


I stamped the dog on white card stock and coloured him with Copic markers and cut him out. I also stamped him on the card panel which is a gelli print, and adhered him over the top. I added some shading with a coloured pencil and lastly added the sentiment. I then adhered the panel onto a white card. 

I have used :


Thank you for stopping by today ! 

Monday, 24 July 2017

Trust your crazy ideas

Hello everyone, 

I have made this postcard with the Dancer set from Vera Lane Studio... Isn't that cat cute !!! I made a 'wall' from book paper and drew the little canopy on white card stock to put above the door. I finished off with washi tape and a Tim Holz Small Talk sticker.


I used the new Just Dance set :


You will find it HERE

Thank you for stopping by today ! 


Sunday, 23 July 2017

Dancers don't need wings

Hello everyone,

For my DT post for Vera Lane Studio today I had some fun with the new set called 'Just Dance'.


She is adorable isn't she. I had loads of fun colouring her with my favourite Copic Markers. She has been adhered to a gelli printed background the same as the sentiment. 

Thank you for stopping by today ! 


Thursday, 11 May 2017

Strong women with a new VIDEO !

Hello everyone,

I am ashamed to see that I haven't made a YouTube video for a while ! So yesterday afternoon I had a little time to spare and filmed making a quick art journal page. I haven't added many words to it but if you have any questions about it, please let me know and I will answer them as well as I can.

I also still am not on top of the 'shaking' camera problems... if anyone knows why this is happening, please let me know. The camera is fixed and stable.

Anyway here is the page I made :


And here is the video:


Thank you for stopping by today !! 


Tuesday, 28 March 2017

A trio of cards

Hello everyone,

and welcome to my blog where today I am sharing three cards I made with Visible Image Stamps. These are all from the newest release.
All three cards have a gelli printed base. The first and third card are from the same gelli print. The middle one is a different one.


The sentiment here was heat embossed twice with two different colours of embossing powder and you can just see the dark powder peeking out at the edges....


She looks so serene, doesn't she ? 


And this one is really simple. I so loved that background that I didn't want to cover it up too much... 


I have used the following stampsets:
Card one:

Card two:

Card three:
Face it
Create it
Own it

Thank you so much for stopping by today ! 

Social Media links..
Shop where you will find all our awesome stamps!
Blog see all our latest posts here!
Facebook group join in with the banter and enter our ‘Show & Tell’ Monthly Challenge!
Facebook PAGE …give us a like and enter our weekly giveaways!


You can also follow us on:

Sunday, 26 February 2017

Imagine

Hello everyone,

Hallo allemaal, 


I am very happy to be on the "De Duif Design Team" and for my first blogpost I have been playing with the new Distress Oxide Inks and will have some more blogposts and a YouTube tutorial over the next few weeks. I have tried different techniques and this card was made with a gelli plate. I did find out that it was better to use a brayer to apply the ink to the plate as the result is a little more subtle. 
When I was happy with the result of printing, overprinting and splattering with water, I added some stamping to make the background a little more interesting. I used the Distress Oxides for this too.  The flowers and sentiment were stamped and coloured separately, cut out and glued on. I coloured the flowers with Copic Markers.  You'll find a list of all the supplies I used at the bottom of this post. 

Ik ben blij dat ik ben gekozen om deel uit te maken van het DT van 'De Duif' en voor hen heb ik 
 lekker geëxperimenteerd met de nieuwe Tim Holtz Distress Oxide Inkt en over de volgende weken heb ik nog wat projectjes en een YouTube tutorial om te delen. Ik heb verschillende technieken geprobeerd en de achtergrond van deze kaart is gemaakt met een gelli plate. Tijdens het doen kwam ik tot de conclusie dat het beter is de inkt op de gelli plate aan te brengen met een brayer, het resultaat is dan net wat subtieler. 
Toen ik tevreden was met het resultaat van printen, herprinten en spetteren met water, heb ik de achtergrond bestempeld om hem interessanter te maken. Voor dit stempelen heb ik ook de Distress Oxides gebruikt. De bloemen en de tekst is apart gestempeld, uitgeknipt en opgeplakt. De bloemen zijn gekleurd met Copic Markers. Hieronder vindt je een lijst van spullen die ik gebruikt heb. 


Distress Oxides:


Stempels/Stamps:

Stampers Anonymous Mini Bouquet CMS269

Copic Markers: 


Thank you for stopping by today ! 

Leuk dat je er was ! 


Tuesday, 16 August 2016

Glimmer of light

Hello everyone,

For my DT post for Visible Image I have decorated one of their fabulous Monoliths. These are MDF panels that come with their own stand and are very easy to work with. Anyway, here's mine:


This is the front. 


This is the back.


A detail.


another detail. 

I gessoed the Monolith first and then used my gelli plate to put the paint on. It didn't work as I thought it would but I still liked the result. I did some background stamping with ink but also with white embossing powder. (Full list of stamps with links to the shop at the bottom of this post).
The skull and the skeletons were stamped on tissue paper and adhered to the monolith. One of the skeletons was flipped so they are holding hands and looking at each other. I stamped the sentiments directly onto the monolith but had to do some work on the 'glimmer of light' one as it didn't stamp very well. The lightbulb was stamped directly but also on white card; I coloured it, cut it out and adhered it over the top of the one on the monolith. 
That was it, I think ! Great fun to do. 

I used the following stamps & materials from Visible Image:


Social Media, Blog and monthly Challenge details :


Show & Tell Monthly Challenge details: http://visibleimage.co.uk/challenge 


Friday, 5 August 2016

De Craftorij Zomer Challenge - CZC2016 day 56 - 61

Hello everyone,

and welcome to my blog where today I'll share the last 6 cards from the CZC2016; I can't believe it is over already !!! I have so enjoyed it !


Day 56 - Watercolours
Stamped this lovely lady on some Bristol Card Stock, cut slightly smaller that the cards I am using, and coloured her with Zig Clean Color Real Brush Markers. I stamped 'Whatever' next to her and added some washi tape on one of the blank cards. I then glued the panel over the top.


Day 57 - hand(s)
I used one of my gelli printed backgrounds for this. The hand is a stamp and I stamped it with VersaFine Ink and then clear embossed it. It makes it just that little bit blacker... I added some words from the same stamp set and drew some lines around the edges. 


Day 58 - Mirror image
I stamped the bird once as it is and once on a piece of acetate. I then stamped the acetate on paper and hey presto a mirror image. I coloured them both and adhered them to a gelli printed card. I added a Tim Holtz Chit Chat sticker. 


Day 59 - Image transfer

I printed this image of Johnny Depp (swoon, swoon) on a laserprinter and then cut it out. I added gel medium to the image and to a pre painted card. I stuck the image on face down and used an old credit card to scrape over the top. This way you burnish the image and squeeze out all the gel medium that is too much. I then dried it with a heat tool and when dry I wetted it it with water and rubbed off the paper. All that is left is the black ink. I added a sentiment, which is a quote from the film 'the Shining', just for fun! 


Day 60 - Purple 
Another gelli print, yes I know, boring.... I have loved using all these gelli prints, which make for quick projects. I stamped over the top a little, added some white drops of paint and then added a Design paper circle to put my doggie on. He is part of the new stamp set by Tim Holtz, crazy dogs. I coloured him with Copic Markers and glued him on the circle. Lastly I added a sentiment by VivaLasVegaStamps!


Day 61 - Anything goes, 15 minutes
This one was made from bits lying on my desk. A gelli print, an already stamped and coloured image and a few bits of washitape. All I did was stamped the background, added the image and a sentiment and drew a line around the card. 


And here they all are.... 61 cards ! 

I now have to turn them into two books... I'll be back !!! 

Thank you for stopping by today ! 


Saturday, 23 July 2016

De Craftorij Zomer CHallenge - CZC 2016 - day 46 - 50

Hello everyone,

Another 5 cards done ! Yay... Here they are:


Day 46 - cartoon figure
I found this in a magazine from a gallery. It is a picture of a proper painting. I thought it was perfect for this card. I used some Kraft card stock for the base and clear embossed the flags. I coloured the bottom around the image with brown markers. The sentiment I got of the internet. 


Day 47 - Use a photo... 
I found this photo in an antiques market in Brighton in England. I love rummaging through boxes of photos. Although it is also a little sad that family photos end up there... 
I added her on top of some cambric and a doily on a gelli print. The chipboard was heat embossed with copper embossing powder. I added the flags and stamped the stars on them.. 


Day 48 - big, bigger, biggest
Again a gelli print. I stamped the Stampotique guys on book text and gave them a little colour with pencils. I added them to the card on top of some washi tape. 


Day 49 - emotion
I added the white embossed stamp to the gelli printed card as a base for the stamp to sit on. She was stamped on photo paper with StaZon ink. I cut her out, leaving a small white border around her. She was placed on a 'nest' of black thread and stapled to the card. The sentiment came from the internet and was typed, cut apart and glued on the card. I went around the strips with a black pen. 


Day 50 - washi tape
I covered a card in washi tape. and stamped the stars and circles on it. The stars were white embossed. The black circles were stamped with StaZon. The girl was stamped separately on white card stock, coloured with Copics and cut out. I adhered her to the card. 

Thank you so much for stopping by today !!!