Showing posts with label Faber Castell Big Brush Markers. Show all posts

Tuesday, 7 July 2020

An art journal page

Hello everyone,

Welcome to my blog where today I am sharing an art journal page that I have made for AALL & Create. Here it is:


And here is how:

I used a brayer and three colours of acrylic paint to colour my paper. I then used the Totally Dotty stencil to add the white circles. I used acrylic paint, but you could also use gesso. 


I then printed this stencil with Distress Oxide Inks. 


I toned it down with more white paint and my brayer and added some stamping. I used Distress Oxide inks in similar colours to the background. 


Next, more stamping with black for the contrast. 


I used the bottom of the typewriter stamp to add some more stamping in grey. I stamped it over the black circles and then dragged the ink pad over the edges. 


I wanted some more texture so I added some modelling paste through this stencil. 


I had a piece of paper that I used to mop up the left over paint from the background and stamped one of these lovely flowers on it. I planned to add some more colour with Big Brush Markers. They work really well over acrylic paint. 
After colouring I cut the flower out and added it to my page on which I also stamped the flower to get all the small details. I added the sentiment which is part of the Typewriter stamp I used before. 


Lastly I also used a black fine liner and a ruler to add the black line around the page. 


I have used the following stamps and stencils:

Stencils:
#2 - by Olga Heldwein
#67 - Broken circles by Autour de Mwa
#87 - Totally Dotty by Autour de Mwa

Stamps:
#349 - Bold Alphas Mini by Bipasha Bk
#366 - Roundly by Autour de Mwa
#325 - Time Up by Bipasha Bk 
#324 - Blooming Beauty by Bipasha Bk 

For more information about all the AALL & Create products please visit:


Thank you for stopping by today ! 


Wednesday, 5 June 2019

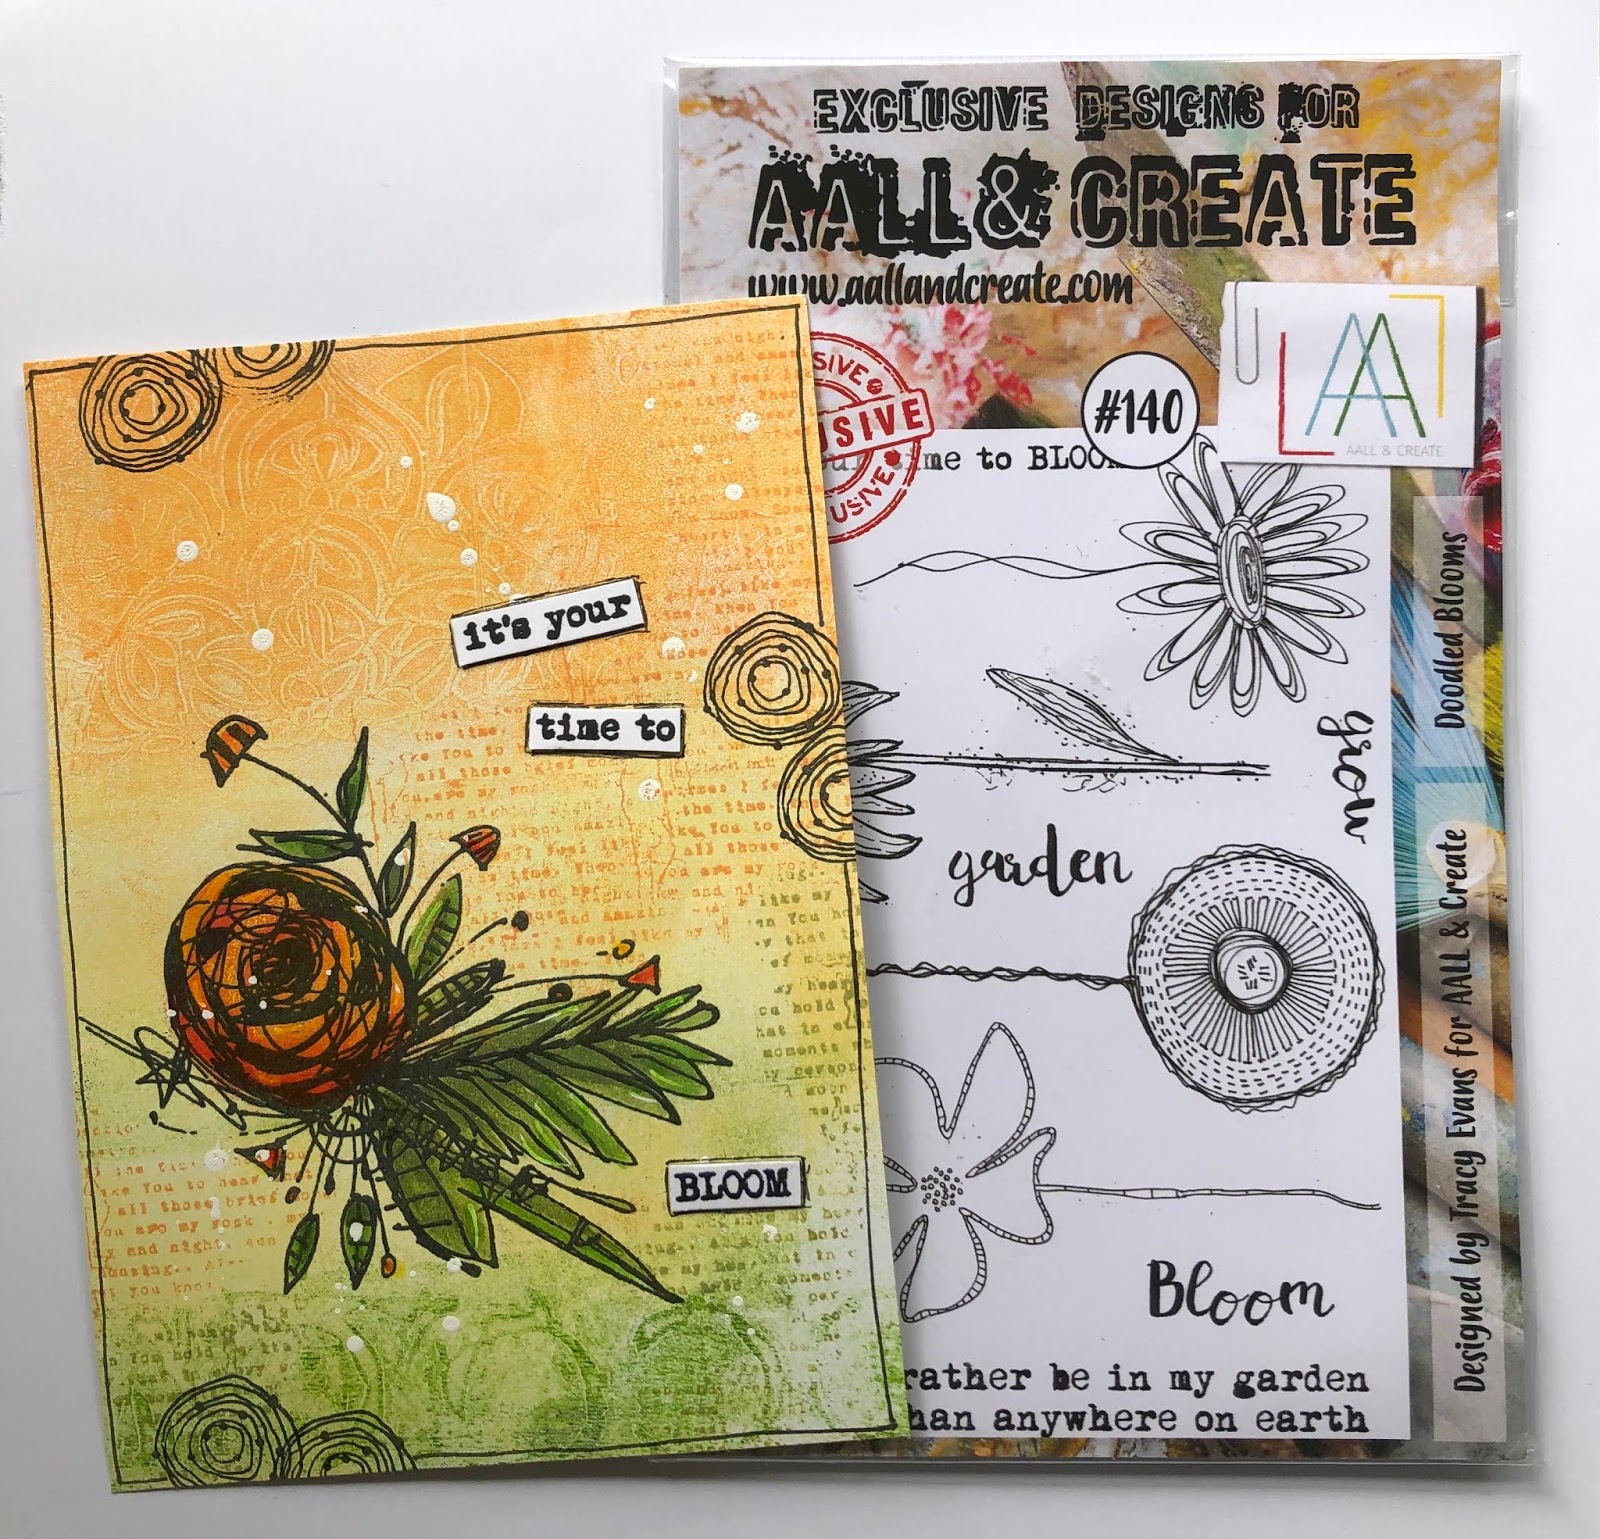
It's your time to bloom

Hi everyone, 

For today's AALL & Create project I have made a card. I used a few different stamp sets and for the base I gelli printed a piece of paper. 


Here's how I made it:


I gelli printed the base, starting off with yellow and then adding more paint (orange and green) to the plate. I put the stencil on it and brayered over to get the pattern into the paint and then printed over the top of the yellow.


Here you can see the pattern. 


Next I stamped the Bouquet Small stamp with black Versafine Clair ink and heat embossed it with clear powder. 


I then used my Faber Castell Big Brush markers to add colour to the flower and the leaves. I also splattered some white paint over the top. 


Here's a close up.


Next I stamped the background with orange, green and black inks and doodled a line around the panel. 


The sentiment came from this set called 'Doodled Blooms', I stamped it, cut it out, matted it on black card stock, changed my mind and cut it off again, adhered it onto the panel and went around the words with a black pen. 


And there is is, mounted on a white card base. 

I have used the following stamps:
#134 - Dot matrix
#140 - Doodled Blooms
#146 - Kings and Queens
#183 - Bouquet Small

Stencil:
#49 - Rota Vitae

For more information about all the fab AALL & Create stuff please visit:


Thank you for stopping by today ! 


Saturday, 15 December 2018

Fern - Field Notes and a new VIDEO !

Hello everyone,

welcome to my blogpost for AALL & Create where today I have made a tag with a process video !


If you's like to know how I made this, please hop over to my YouTube channel HERE or click the pic below. 


I hope you enjoy ! 

I have used : 
Stamp set #45 
Stamp set #110 - Numbered Botanical 
Stencil #45 - Digital Bubbles

If you are interested in any of the AALL & Create products please visit :


Thank you for stopping by today ! 


Tuesday, 20 November 2018

Magical

Hello everyone, 

A little while ago we were asked by the lovely France Papillon to make samples with her new stamps. The reason for this was that she would be featuring them on Hochanda TV ! How exciting ! I made 4 samples with the yummy new stamps, stencils and stickers and I will be sharing them with you here on my blog.   


I love how this tag turned out. I started with cutting a tag shape out of Mixed Media Paper. I then added a layer of gesso and when that had dried I finger-painted the page with DecoArt Fluid acrylics. When all this had dried I added some stamping in the background using Archival Inks and white paint. Just a reminder: if you use paint with your stamps, make sure to wash them immediately after use ! I used stamps of Frances sets "1800" and "Rock'n Rust" for this. Next I stamped the horses from set "1800" on book pages and painted a layer of Matte Medium on them. I did this so I could colour them with my Faber Castell Big Brush Markers. These are permanent but if you use them on top of Matte Medium you can move the colour around for a little while. I then cut the horses out and adhered them to the tag, cutting off the excess. Lastly I added a tiny bit of doodling along the sides and a sentiment stamped from the set "How shall I put it". 

If you are interested in any of Frances fantastic products then have a look HERE

Thank you for stopping by today !

Friday, 12 October 2018

Grow kindness and a GIVEAWAY !!!! YAY !

Hello everyone,

for today's AALL & Create project I have made a little canvas. It measures 20 x 20 cm or 8 x 8 inches approx.


And here's how:


I planned on using these AALL & Create products but later added another stencil ! 


After painting the canvas with my fingers and rubbing away some of the paint through a stencil (#45) with a baby wipe, I added some white paint with a brayer and some modelling paste through the other stencil (#39). 


Next I used part of the stamp #109 for stamping the background here and there. 


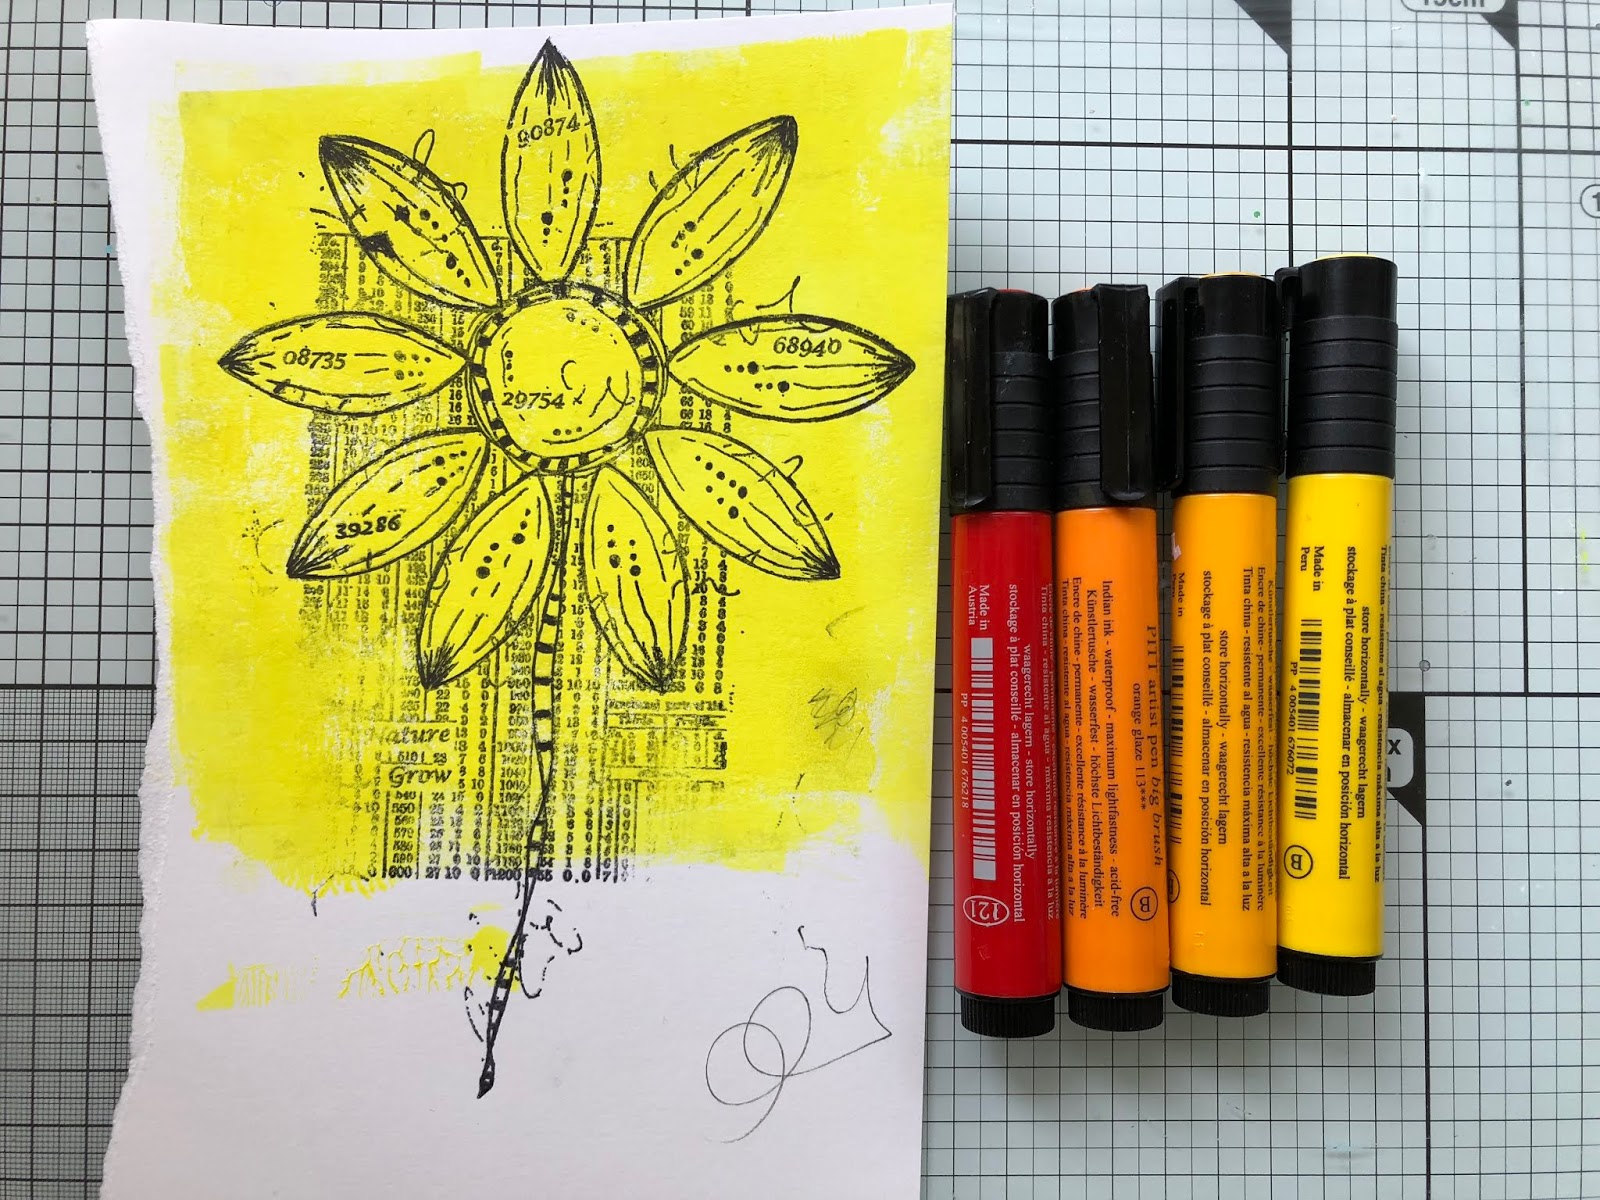
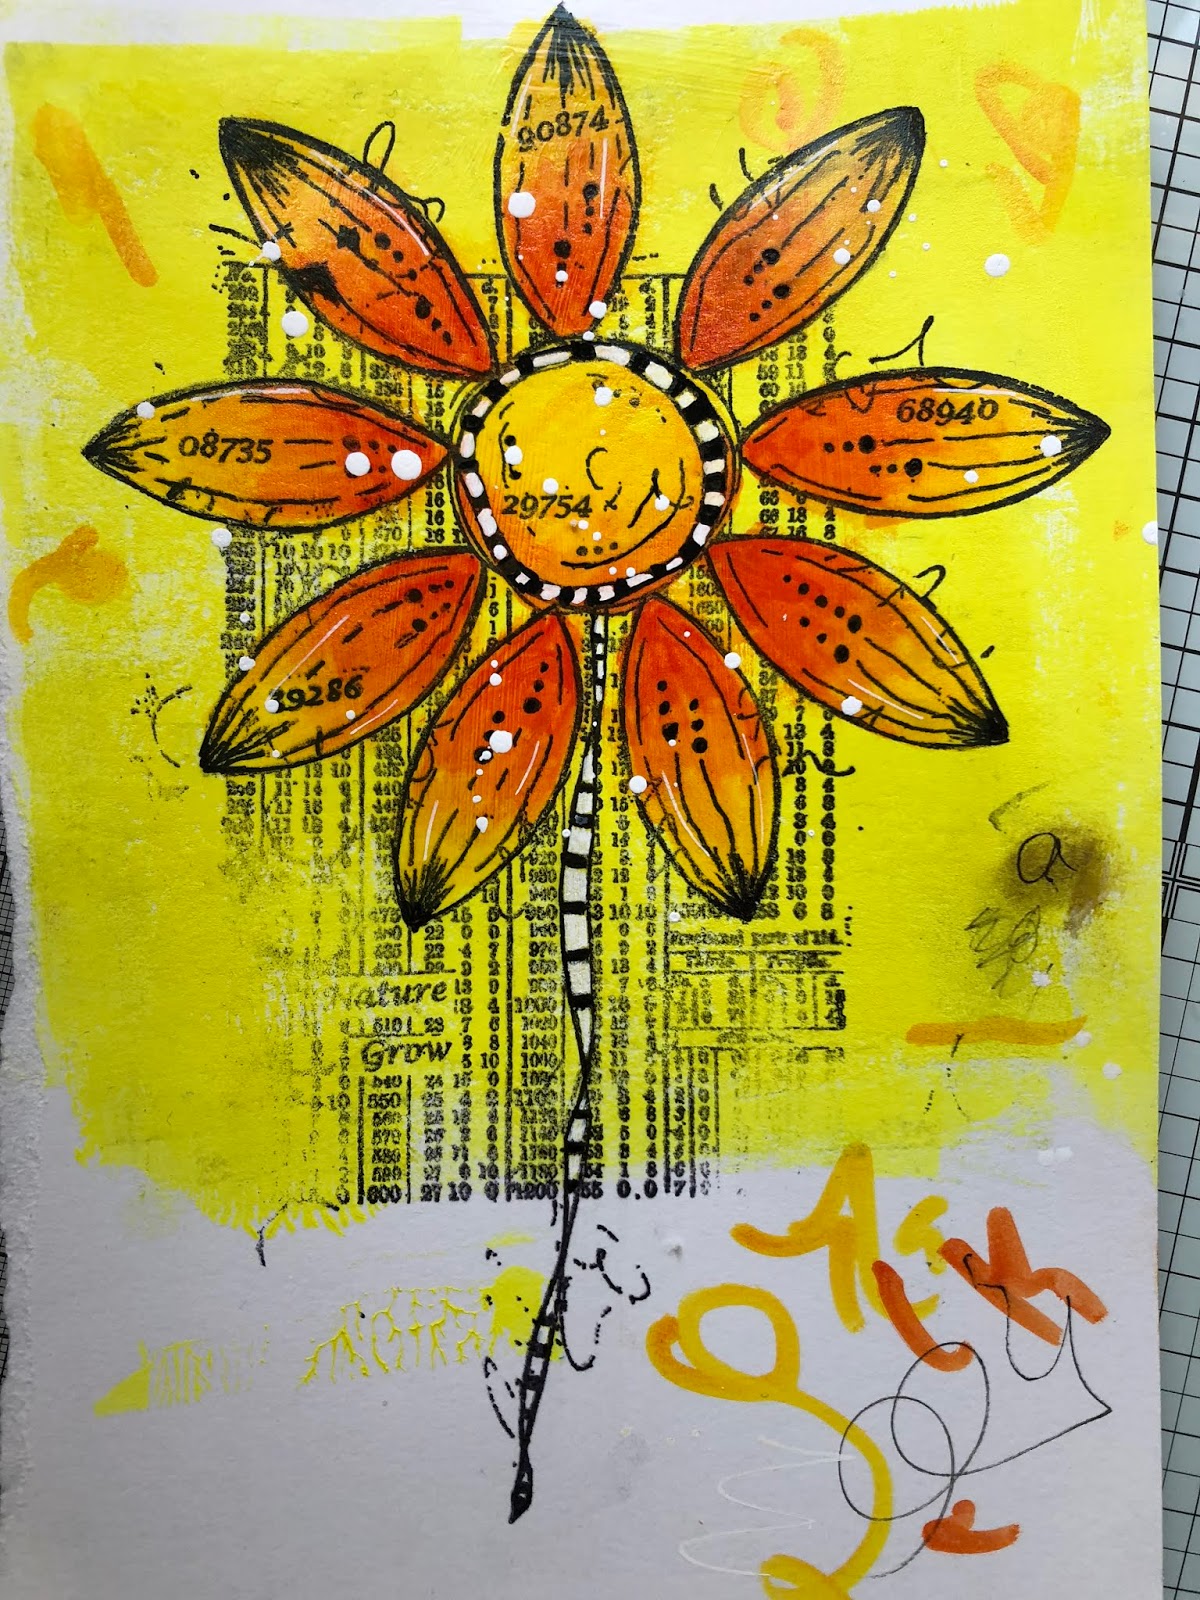
I painted another piece of paper with yellow and stamped the flower on it, next I painted over it with gel medium because I wanted to add some colour with Big Brush Markers. You can move the colour over gel medium before it dries.. after that it is permanent. 


These are the colours that I am using...


And this is the result, I also added some white pen and white paint splatters. 


..and of course I put some splatters on the canvas too.. 


I have used :

Stamp : #109 blossomed numbers by Tracy Evans
Stencil #39 by Autour de Mwa
Stencil #45 by Autour de Mwa

For more information about the products and a list of international stockists please visit:


Also today I have a give away. Abs from AALL & Create kindly let me give away one of the big stamp sets (A4) ! and here it is :


I am going to give this stamp set away ! But.... there is something you will have to do ! 
First of all you have to leave a comment on my FB page under the post that shows this photo ! Next you will have to mention a friend who also loves AALL & Create products but you will have to fight over the stamp as I have only one to give away ! On the upside; you could always divide it in two ! lol Anyway, good luck everyone ! I will draw a winner on Wednesday 31st of October ! 


Thank you for stopping by today ! 


Friday, 17 August 2018

Fearless

Hello everyone,

For today's AALL & Create post I have made a card.


Here's how I made it:


This was what I planned to use, but I used less paint and more stamps.... lol - A girl can change her mind, can't she ? 


I brayered the yellow and green paint onto a card panel and added stencilling with Orange Distress Oxide. 


Next I used another stencil and model paste to add the tiny flowers. I also added some stamping in the background with the #56 A4 stamp.


Next I stamped the butterfly form Tracy's set #45 on painted Mixed Media paper. I used the same yellow as I did for the background. 


I then coloured them with Big Brush Markers by Faber Castell and cut out the wings. I stamped the butterfly twice on the card panel and also added some white splatters. Next I adhered the wings on top, using glue next to the body and foam tape at the edges of the wings.


For the sentiment I used this stampset, also by Tracy. I added some white pen around the letters and black pen around the card panel. I did think it needed more black, so I stamped a tiny sentiment from set #45 three times for more interest. 


And here is the finished card ! 


I think it turned out nice ! 

I used the following AALL & Create materials:

Stamps :

#6 by Tracy Evans
#45 by Tracy Evans
#56 by Olga Heldwein

Stencils:
#11 by Autour de Mwa
#27 by Kassa Hayselden

Thank you so much for stopping by today ! 


Tuesday, 24 April 2018

Be true

Hello everyone,

and welcome to my blogpost for UmWow Studio ! I have created a mini canvas for today and have filmed the process of altering the chipboard. I hope you enjoy !


The mini canvas is aprox. 4" x 4" or 10 x 10 cm. I have painted it with acrylic paints and used Faber Castell Big Brush Markers (same as I used on the chipboard) to make the edges darker. 
I then did some stamping and added the dictionary word 'bird' and the word chip by Tim Holtz. 
That was it ! 

Link to the video is below..


You will find this fabulous chipboard HERE


Thank you for stopping by today !


Tuesday, 20 February 2018

Mysterious

Hello everyone,

and welcome to my post for Um Wow Studio today ! I have made a tag :


I used the 'Wooden Sign' Chipboard

and also one of the 'Layered Clouds'


This is what I did to the 'Wooden Sign': (unfortunately I forgot to take photos what I did to the cloud, it was an afterthought,  I applied 2 layers of embossing powder).


This is what it looks like in its natural form.. 


I started with 2 layers of white gesso. 


I added colour with my Big Brush Markers by Faber Castell. 


This is what it looked like when I finished. 


Next I stamped it with the words: "she was" and "mysterious". 


Here's the cloud I heat embossed it with a coat of dark blue embossing powder first and then went over the top with a light blue with gold flecks in it. I like that you still can see the dark blue here and there. 


A close up. All stamps I used are by VivaLasVegaStamps! The background was painted with PaperArtsy Acrylic paints. 


And here she is again ! 

Thank you so much for stopping by today !