Showing posts with label Texture paste. Show all posts

Tuesday, 12 July 2022

A silent place

 Hello everyone, 

Welcome to my blog where today I am sharing another project for AALL & Create. This time I have made an artjournal page.


Here is how:


I dunked my paper (Approx, A5) in Distress Oxide ink Antique Linen and Fossilised Amber. I then added texture paste with a stencil.


Next I printed this stencil by dunking it into ink and printing on the page. I used Fossilised Amber DOI for this. 


Next background stamping using DOI Fossilised Amber, Ground Espresso and Versafine Clair in Nocturne. 


I then added some pieces of washi tape.


Stamping the focal image


All coloured and cut out, ready to go on the page. 


Here it is all complete. Love it ! Oh, I also added some black splatters using a Posca paint pen.


A small talk sticker by Tim Holtz finished it off. 

I have used :
Stencils:
#38 by Olga Heldwein
#67 - Broken Circles by Autour de Mwa

Stamps:
#715 - Thinking of you by Tracy Evans
#543 - Reckoner Digits by Tracy Evans
#625 - Vine by Tracy Evans
#540 - Daisywise by Tracy Evans 

Washi:
#25 mm by Autour de Mwa
#31 - Take Risks by Autour de Mwa

For more information about all the AALL & Create products, please visit:


Thank you for stopping by today ! 


Tuesday, 21 June 2022

Be unique

 Hello everyone, 

For today's AALL & Create project I have done another art journal page. This time there is a VIDEO about how I made the background. I didn't film the colouring of the images because it makes the video so long.. 


I do have some photos too:


First I stamped the images I wanted to use as focals. 


As soon as I colour the flowers this bright orange I knew I wanted the background to be turquoise blue. 


Started with texture paste...


Then washi tape. 

I forgot to take more photos after this, BUT there is a video where you can see me make this background, colour and all ! lol

Link to YouTube tutorial


There is also a link you can click below the pictures.. 


Click on the picture if you'd like to see the video


I have used :

Stencil:
#139 - Snow Pines by Janet Klein

Stamps:
#625 - Vine by Tracy Evans
#543 - Reckoner Digits by Tracy Evans
#685 - Nature's Angels by Bipasha Bk
#690 - Robin & Nuthatch by Tracy Evans

Washi tape:
25 mm by Autour de Mwa
#7 - Winged Friends by Tracy Evans

For more information about all the products by AALL & Create please visit:


Thank you for stopping by today ! 


Tuesday, 20 July 2021

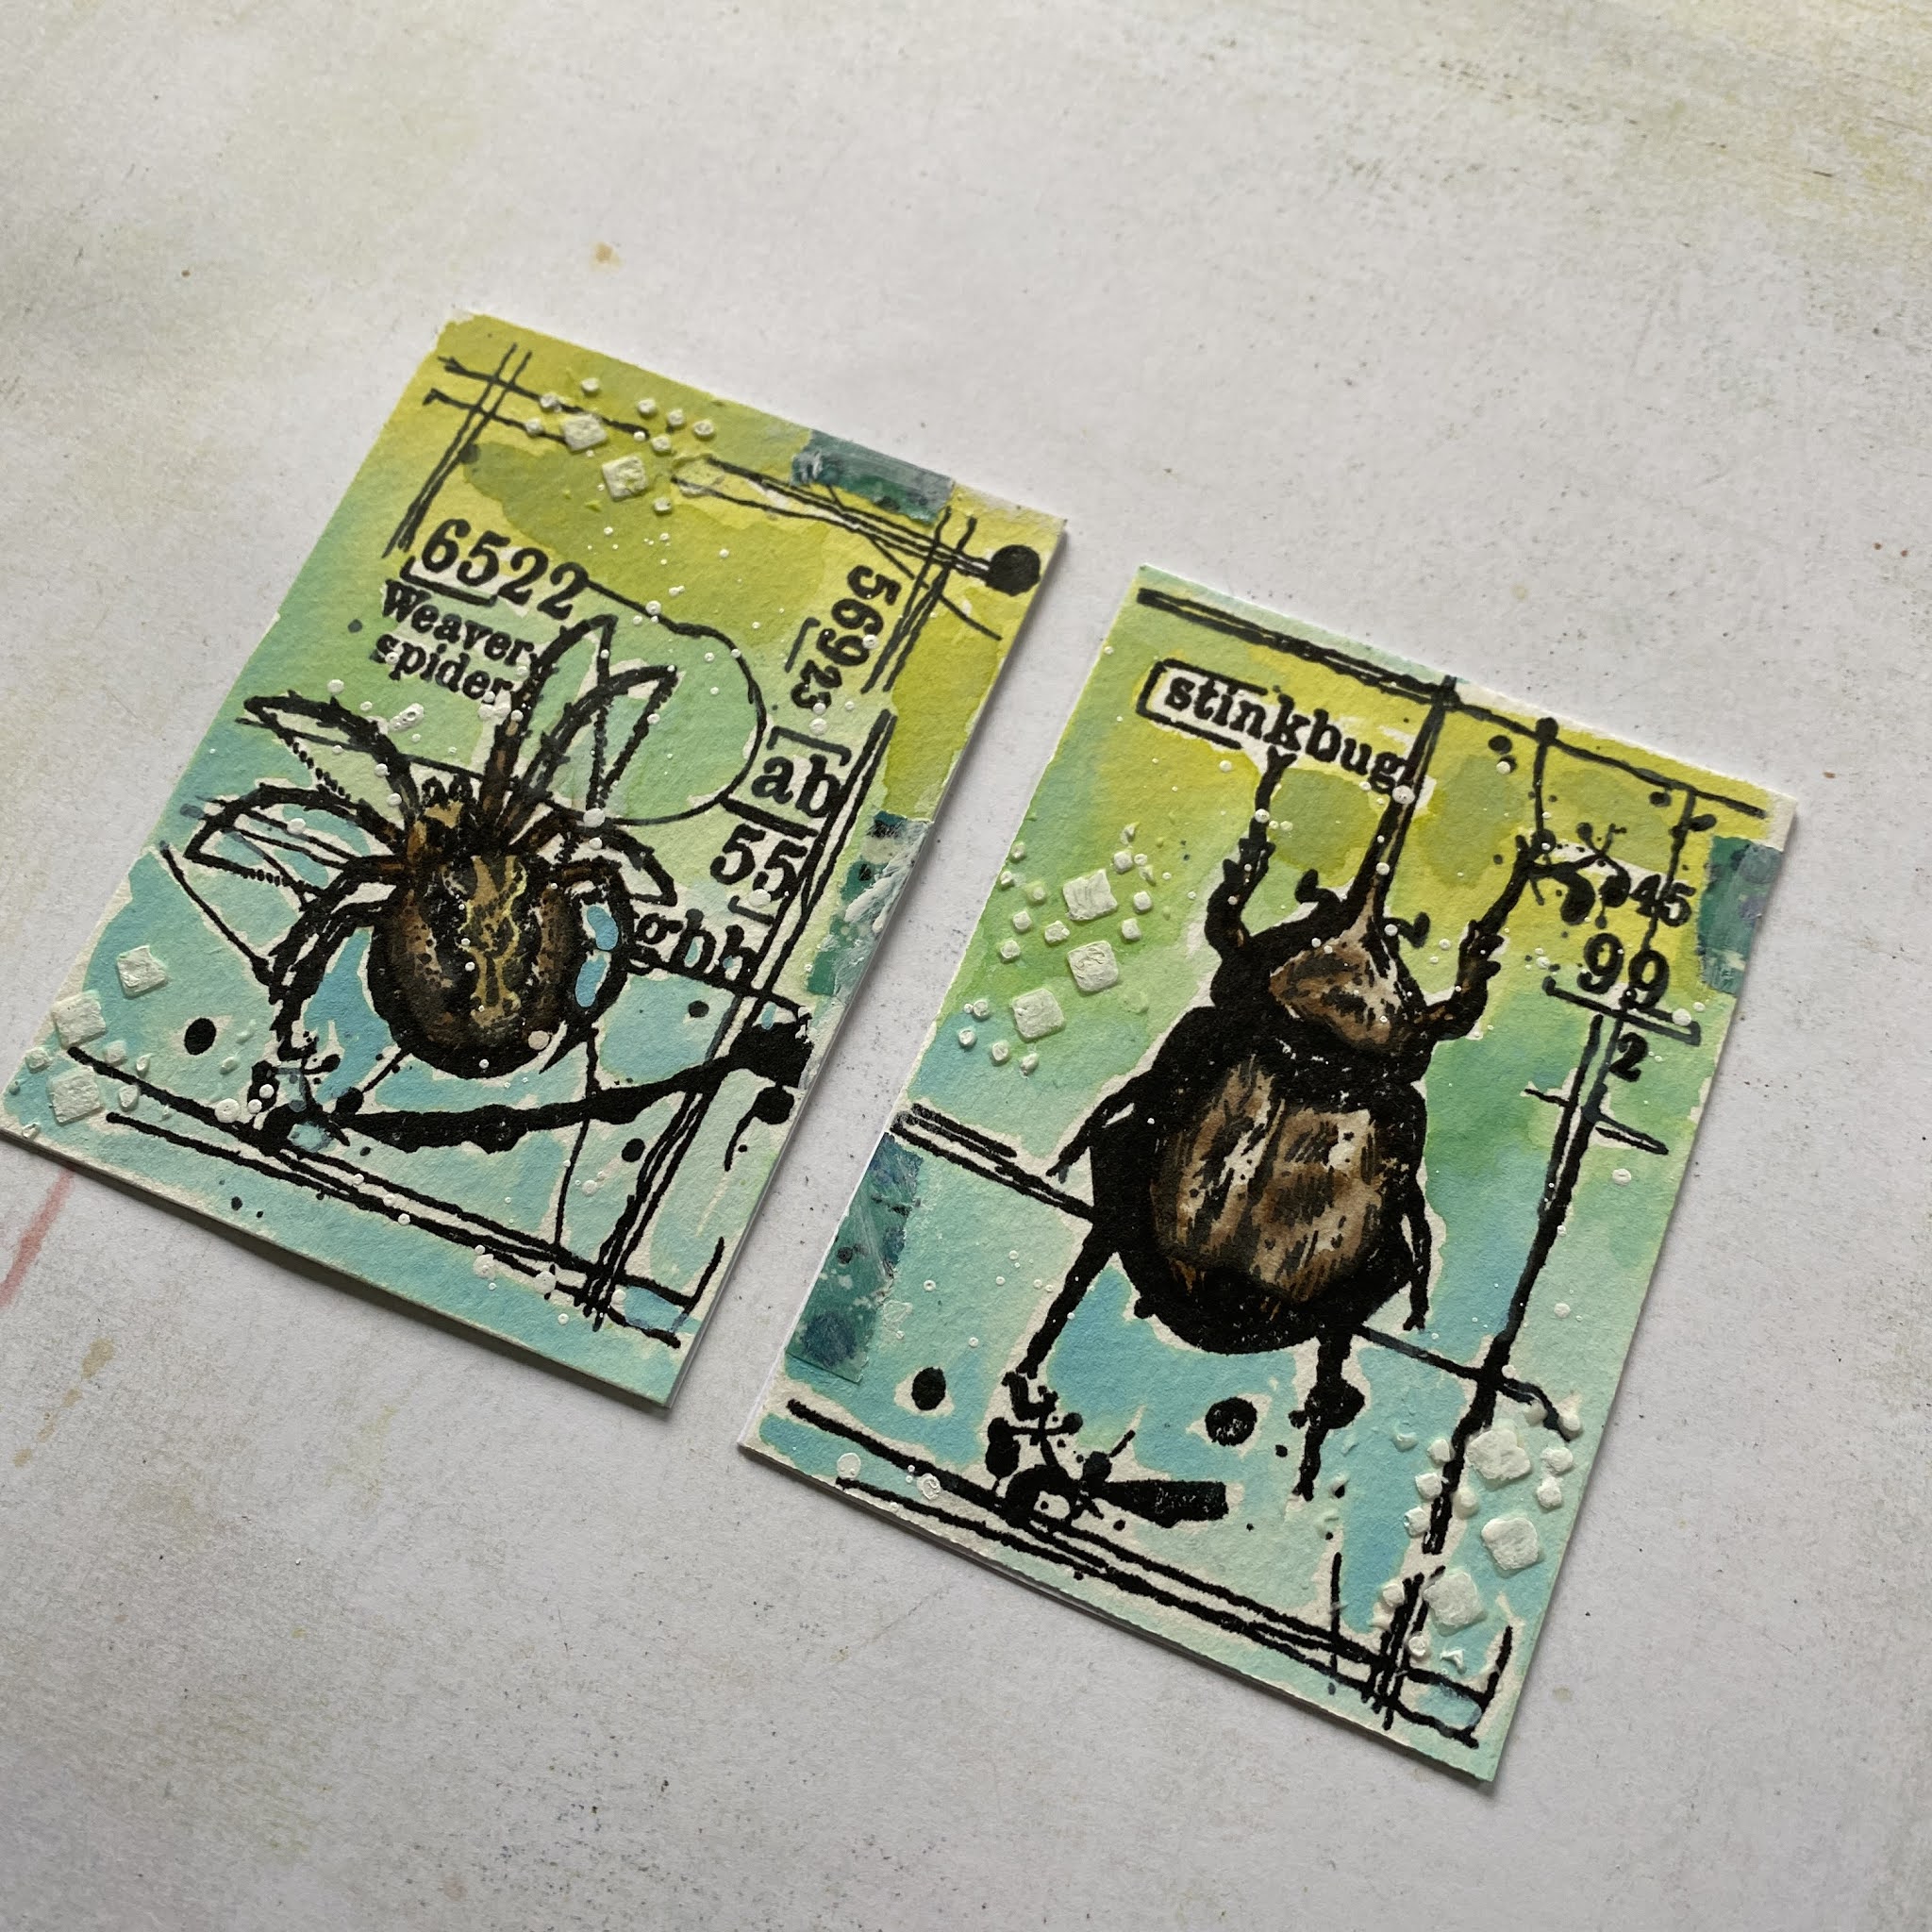
Two insect ATC's

 Hello everyone, 

For this week's AALL & Create project I have made a simple project of 2 ATC's. I am still in the middle of reorganising my craft room and it is taking a little longer than anticipated. Anyway here they are:


Here's how I made them:


On two pieces of 2,5 x 3,5" watercolour paper I stamped the two bugs. I used VersaFine Clair ink as I wanted to use water based products to colour. 


First I coloured the bugs using watercolour markers. 


Next I smooshed Distress Oxide Ink on my craft sheet and used a water brush to colour around the bugs. I used Twisted Citron, Cracked Pistachio and Salvaged Patina. 


When everything had dried I added some texture paste through a stencil. I had to touch it up with white paint as the texture paste soaks up the colour from underneath. 


Next, I added some pieces of washitape and toned them down again with white paint. 


Lastly I mounted them on some card stock to make them sturdier. 


I have used the following products:

Stamp #550 - Stink Bug by Bipasha Bk
Stamp #551 - Weaver Spider by Bipasha Bk

Stencil: #124 - Lotza Diamondz by Autour de Mwa

Washi tape: #21 - Beachrock by Janet Klein

For more information about all the AALL & Create products and a worldwide stockists list, please visit:


Thank you for stopping by today ! 


Tuesday, 18 May 2021

Collector of curiosities

 Hello everyone, 

For this week's AALL & Create GDT post I have made a journal spread. 


Here's how:


I used this stencil with texture paste as a start to my pages. 


When the paste had dried I painted the pages with a yellow and a yellow ocher paint making sure to mix and blend so I had some darker and some light areas. I then added pigment powder to the areas that had the texture paste. I sprayed it with water and let it dry. It stands out better now. 


Next I took a brayer to tone it all down and to lighten the raised areas of the texture paste. Normally I would use white for this but this time I decided on a light yellow. I did this so it wasn't too stark. 


Next I added some background stamping using a yellow, a brown and black ink. 


I stamped my focal images ready for colouring.


I added some washi tape and didn't like it. So I rubbed some of the pale yellow paint over it. Much better but it needed something else. So I added some black splatters and..


......I cut out three crosses from this washi tape..


The focal images all coloured up.


All put together, I added the crosses and glued down the focal images. I painted around the lightbulb to create a little bit of a halo. I also added some pencil lines along the edges and lastly I added a sentiment by Tim Holtz from the Halloween word chip collection. 


I have used the following materials:

Stencil:
 #2 by Olga Heldwein

Stamps:
#366 - Roundly by Autour de Mwa
#349 - Bold Alphas Mini by Bipasha Bk
#350 - Splattered Numbers by Tracy Evans
#387 - Steampunk Alchemist by Olga Heldwein

Washi tape:
#4 - Encrypt by Autour de Mwa
#13 - Fasteners by Bipasha Bk

For more information about all the AALL & Create materials and a list of worldwide stockists, please visit:

www.aallandcreate.com/boutique

Thank you for stopping by today !


Tuesday, 20 April 2021

Bear

 Hello everyone,

Welcome to my blog where today I am sharing a journal page that I made for AALL & Create. This time there is also a VIDEO for those of you who want to see how I made this. There is a little bit of footage missing unfortunately but it is not much and you still get the gist of how it came together. 


here's how : (link to video below)


I started with stamping the crown and masking the bottom, then stamping the bear so he ended up with the crown on his head. I then masked off his hands and stamped the heart. 


I coloured him with watercolours this time. Love these, they are professional Winsor and Newton watercolours and they are pretty amazing. 


Next, I forgot to take a picture... lol. But this bit is in the video. I started with a brayer and lemon yellow paint covering the whole piece of paper (6" x 6"). I then used a gelli plate and the brayer again and put some orange paint down in three places on the gelli plate. I then laid the stencil on it and rolled over again, adding the pattern of the stencil to the gelli plate. I then puled a print. Next I randomly stamped the background. 


I then added some washi tape.


I used this set to make the word bear. I used my stamping platform stamping in yellow first and then adding the orange-y colour to the bottom of the letters creating an ombre effect.


Adding another strip of washi tape to put the bear on. 
Next I used texture paste and this stencil to add some more interest to the background. 


I cut out the letters and put them down to spell bear. That finished the page. 


Click HERE for the video or on the link below :


I used the following materials:

Stencils:
#39 - Lotza Dotz by Autour de Mwa
#127 - Bloomed roses by Bipasha Bk

Stamps:
#400 - Numerator by Tracy Evans
#412 - Head Starts by Janet Klein
#453 - Heart Grunge by Tracy Evans
#456 - Snippet alphabet by Tracy Evans
#466 - Quirky Friends by Tracy Evans

Washi tape:
#13 - Fasteners by Bipasha Bk 

Stamping block:
A6

Thank you for stopping by today !!